Create a workflow
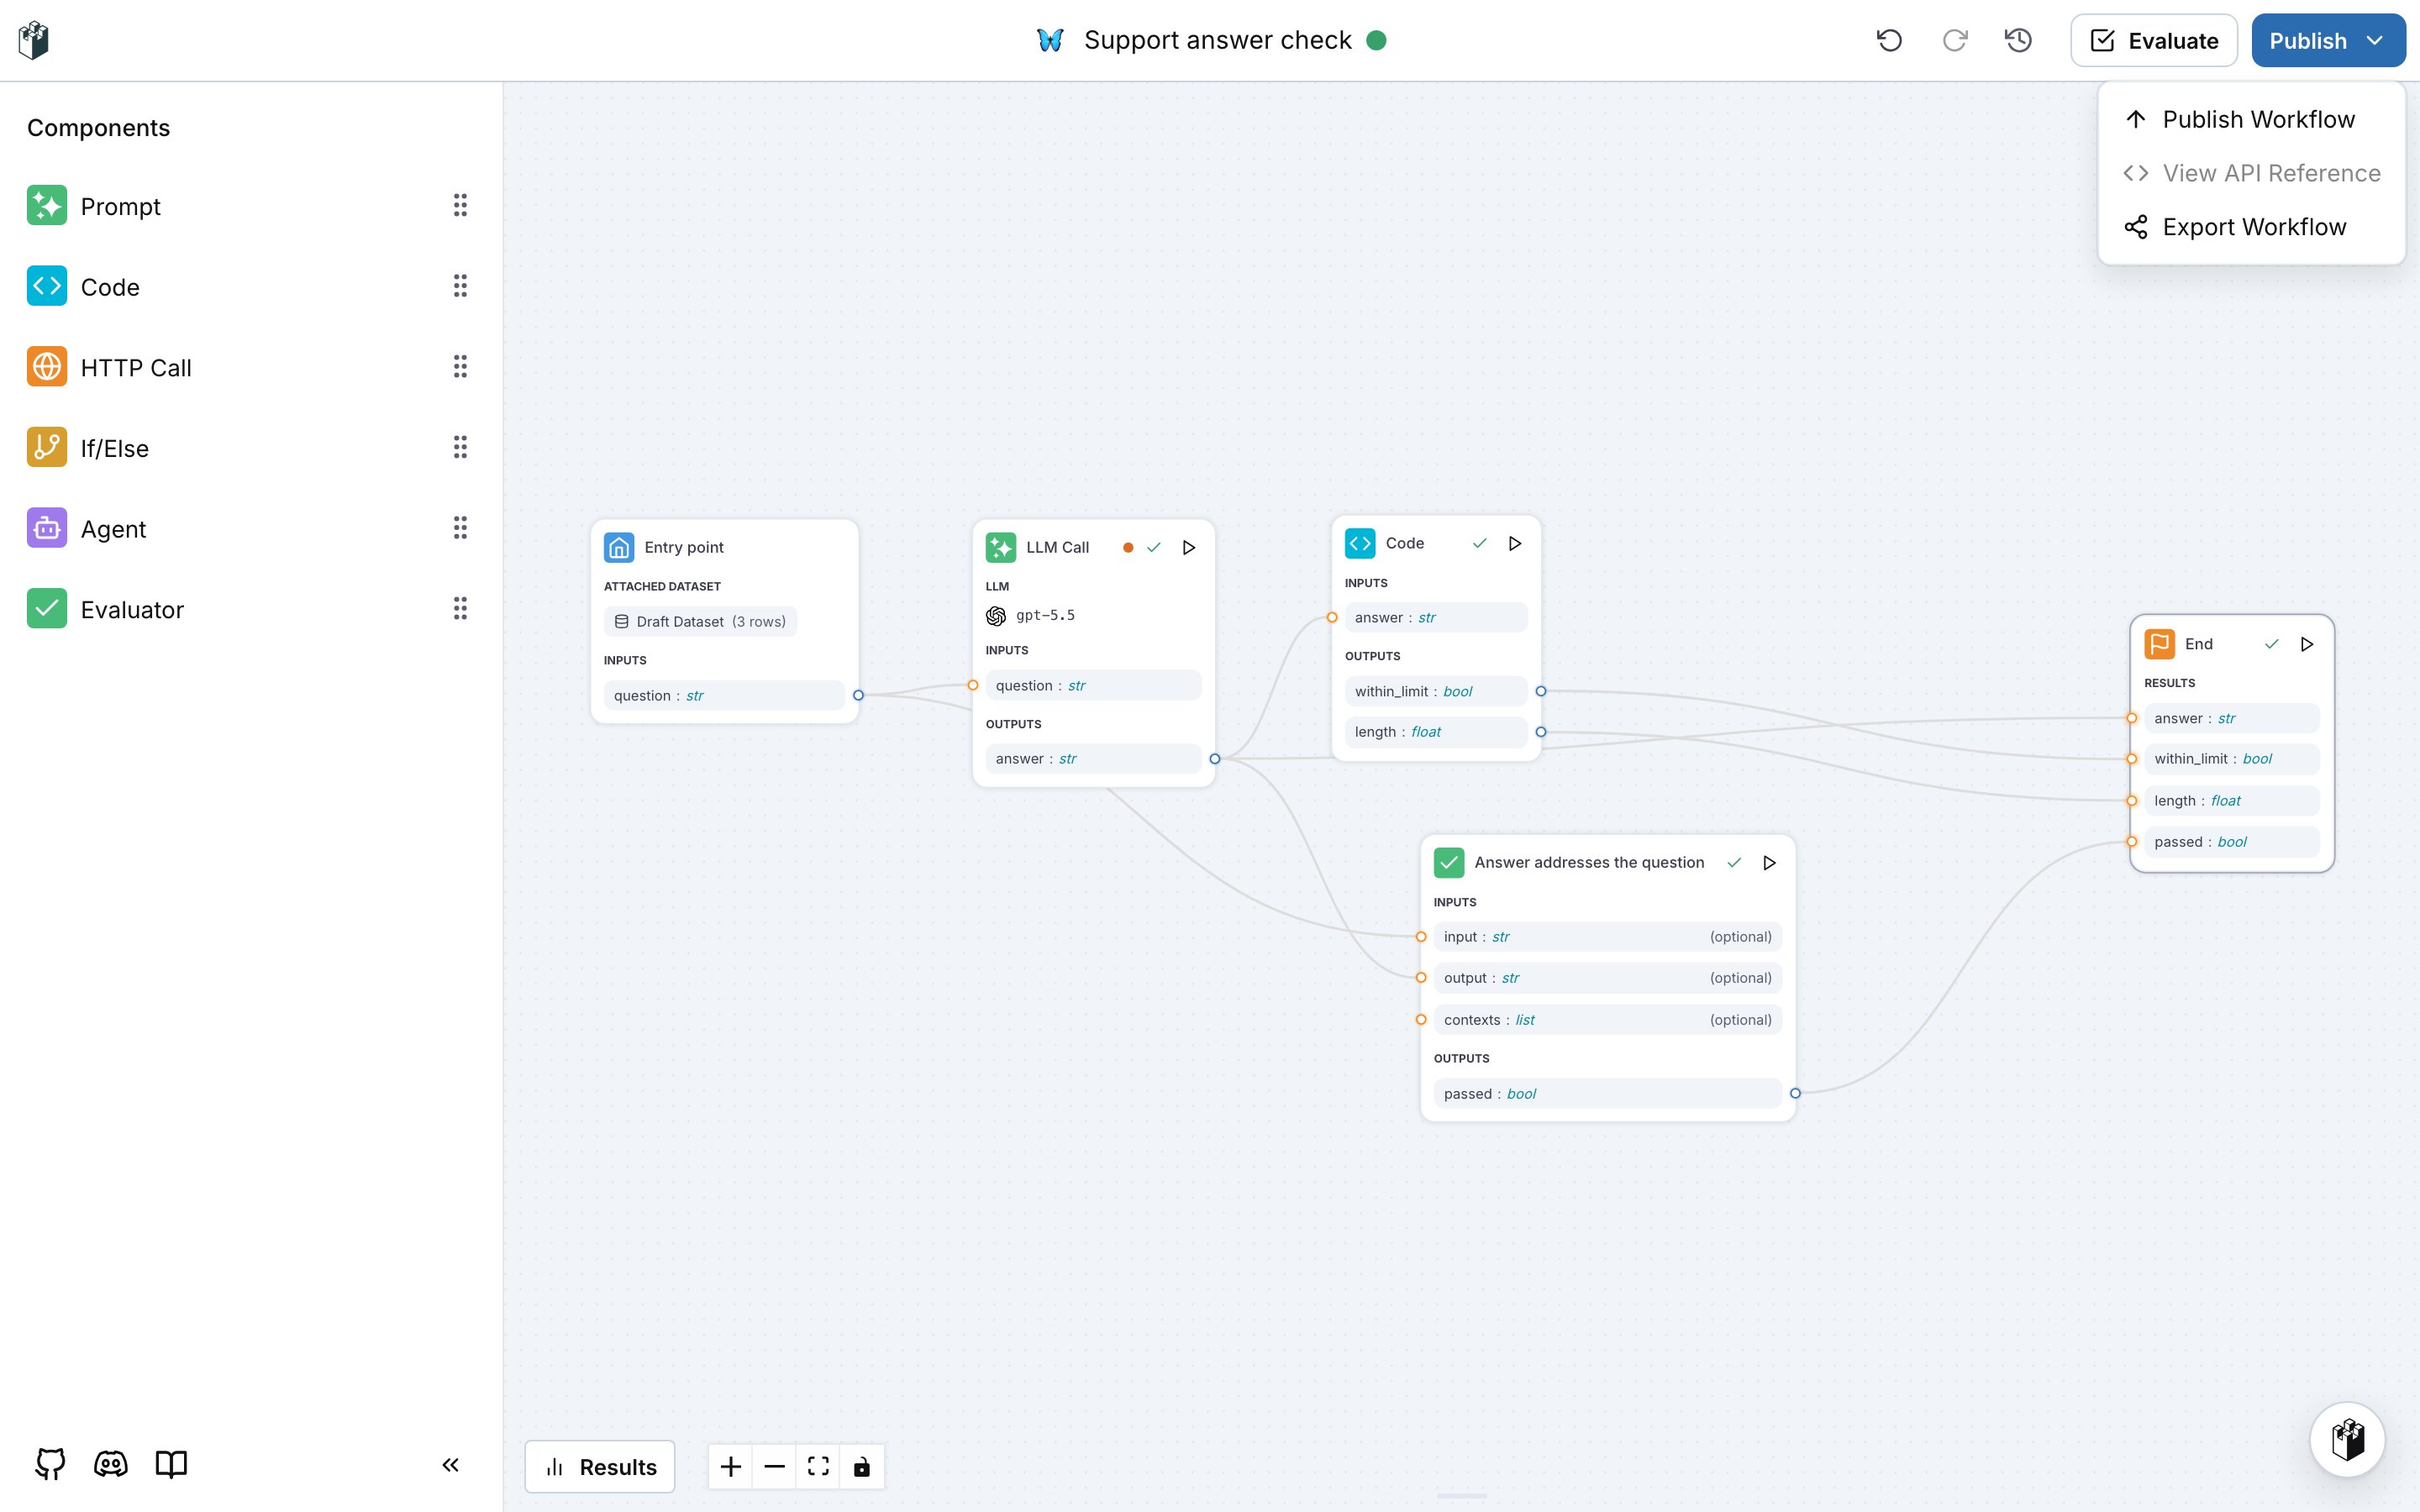
Open Workflows under Build and click New Workflow. Pick a starting point:
Give the workflow a name, an icon and a description, then click Create Workflow. The editor opens.
The editor
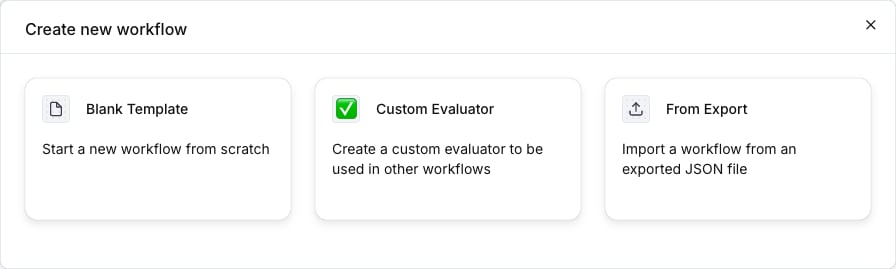
The Components panel on the left lists the node types you can drag onto the canvas. The canvas holds the nodes and the edges between them. Click a node to open its settings in a drawer on the right.
Every node lists its inputs and outputs with a type:
str, float, bool, image, list[str], dict, json_schema or chat_messages. Drag from an output handle on the right side of a node to an input handle on the left side of another node to connect them. In a node drawer, the mapping field next to an input does the same thing: pick the node and the output the input reads from.
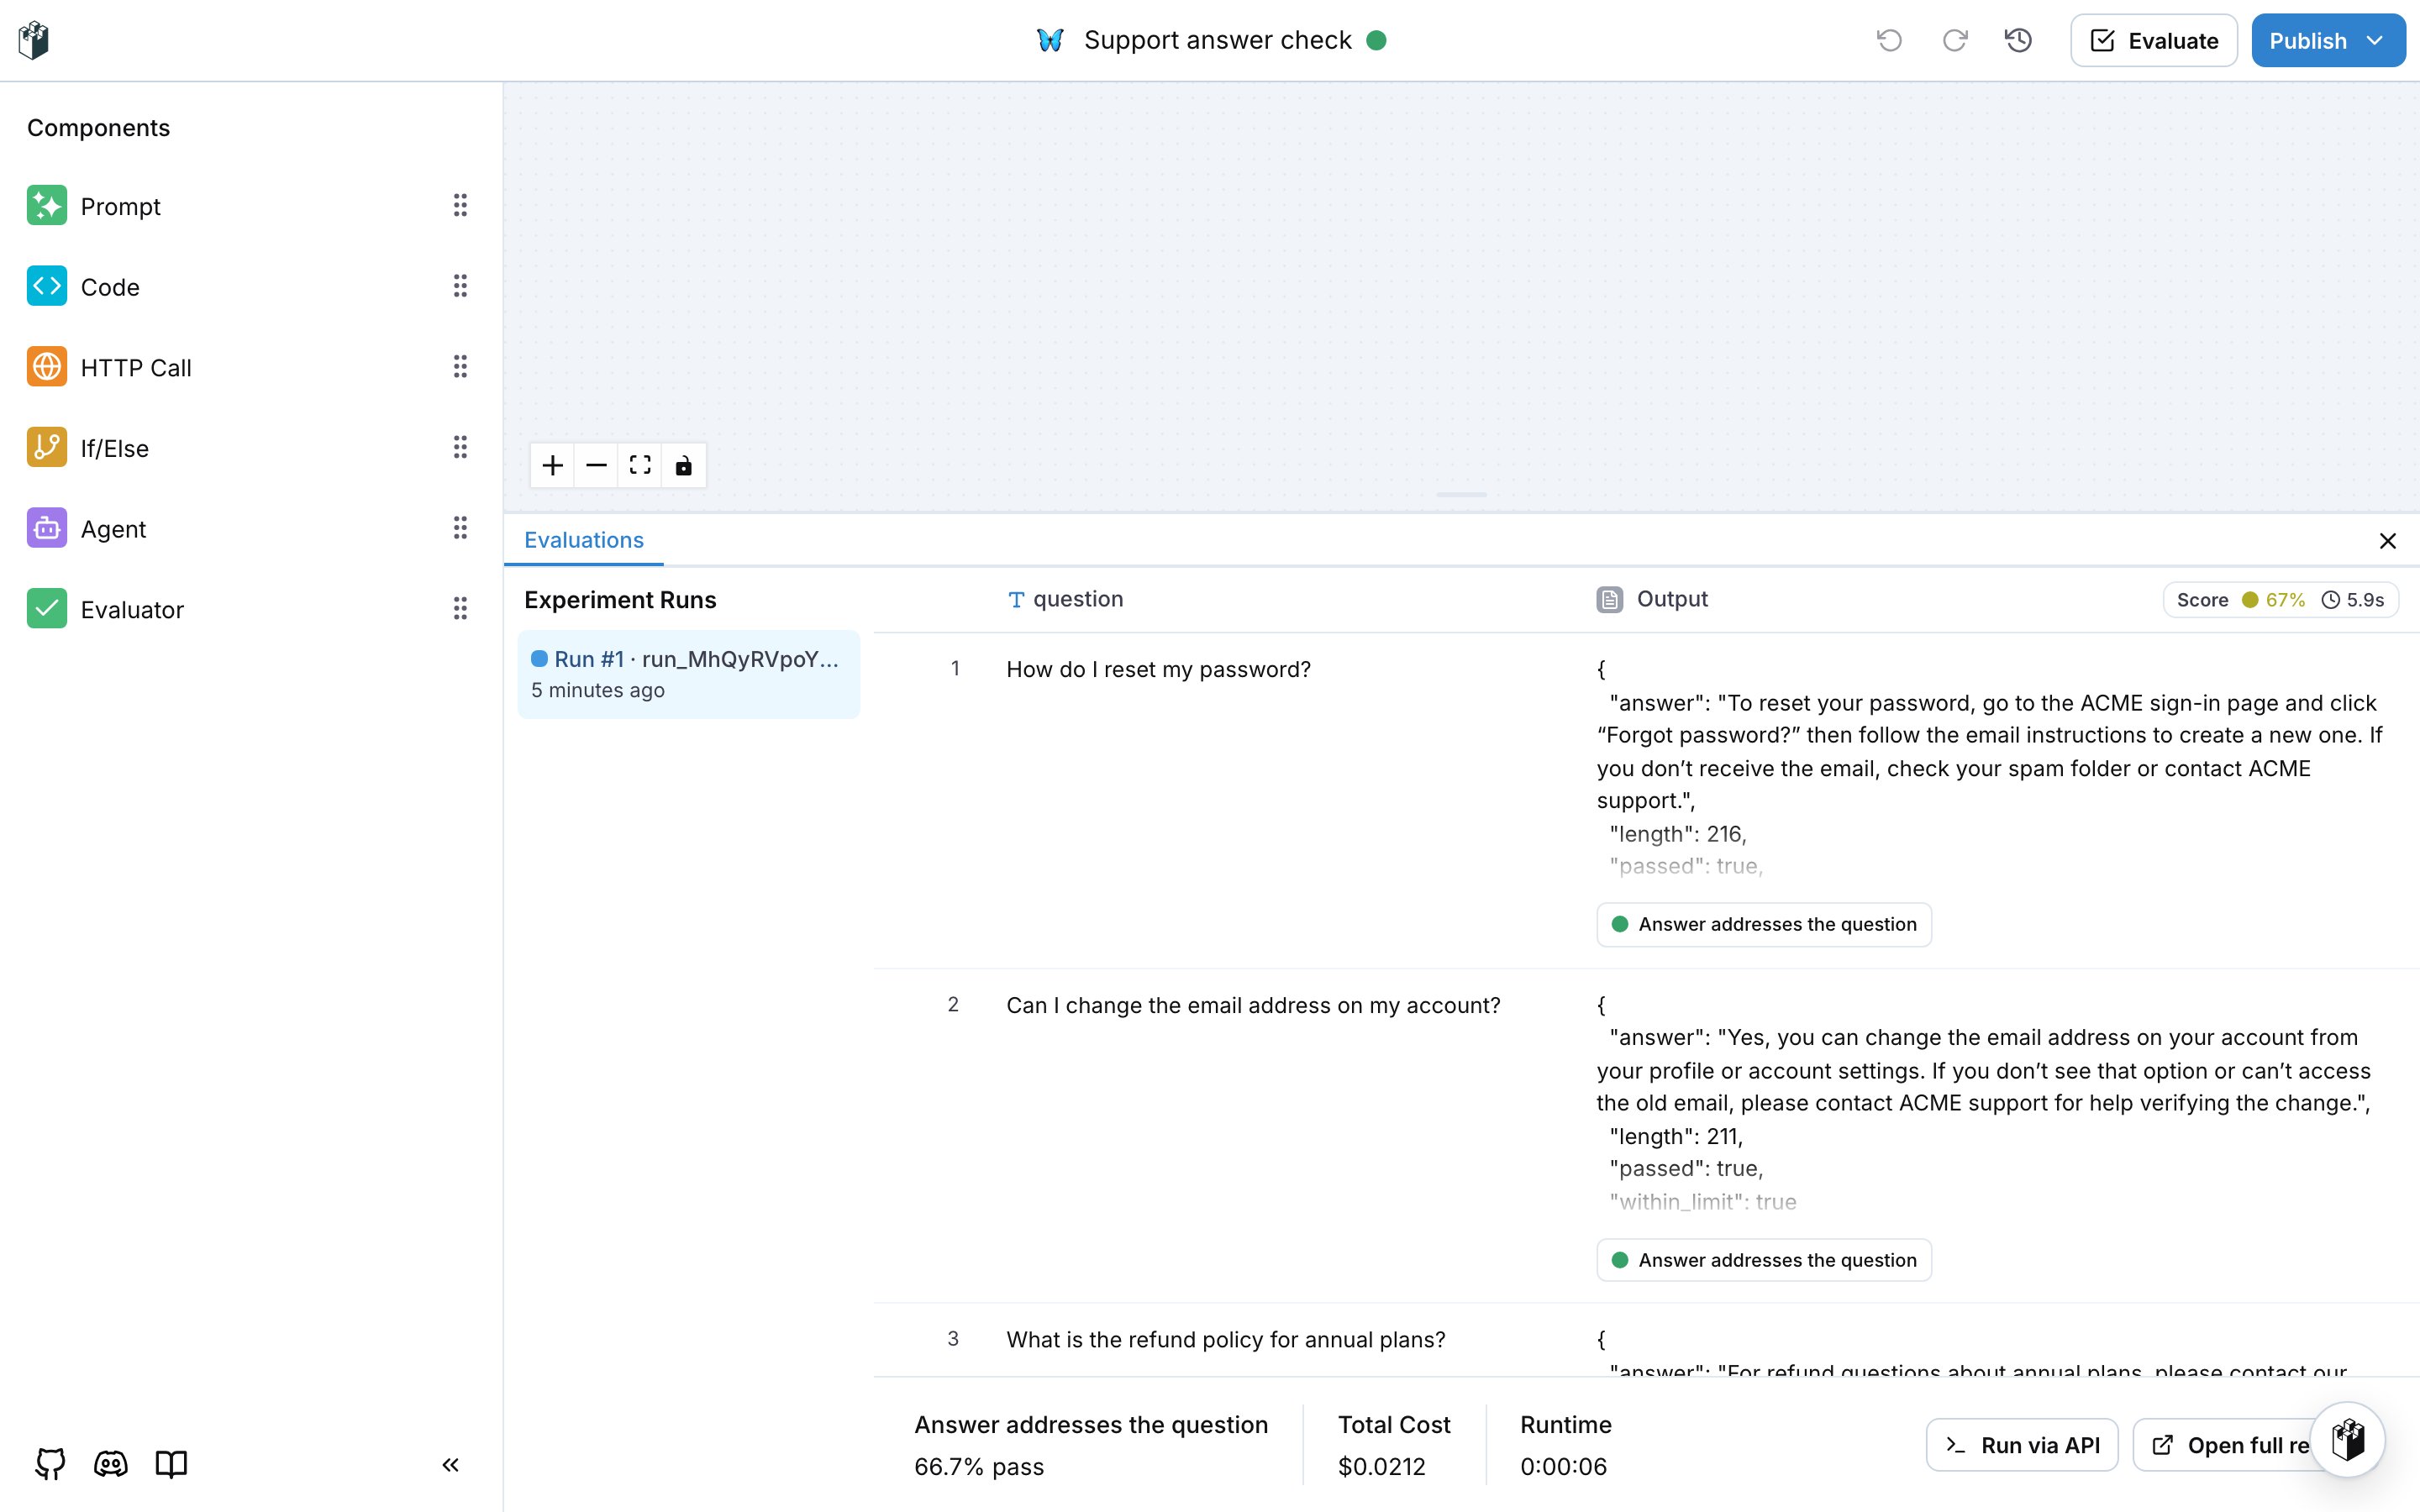
The top bar shows the workflow name, undo and redo, the version history, Evaluate and Publish. The Results button at the bottom opens the evaluation runs of the workflow.
Entry point
The Entry point declares the inputs of the workflow. Every other node reads from these inputs or from the outputs of an earlier node.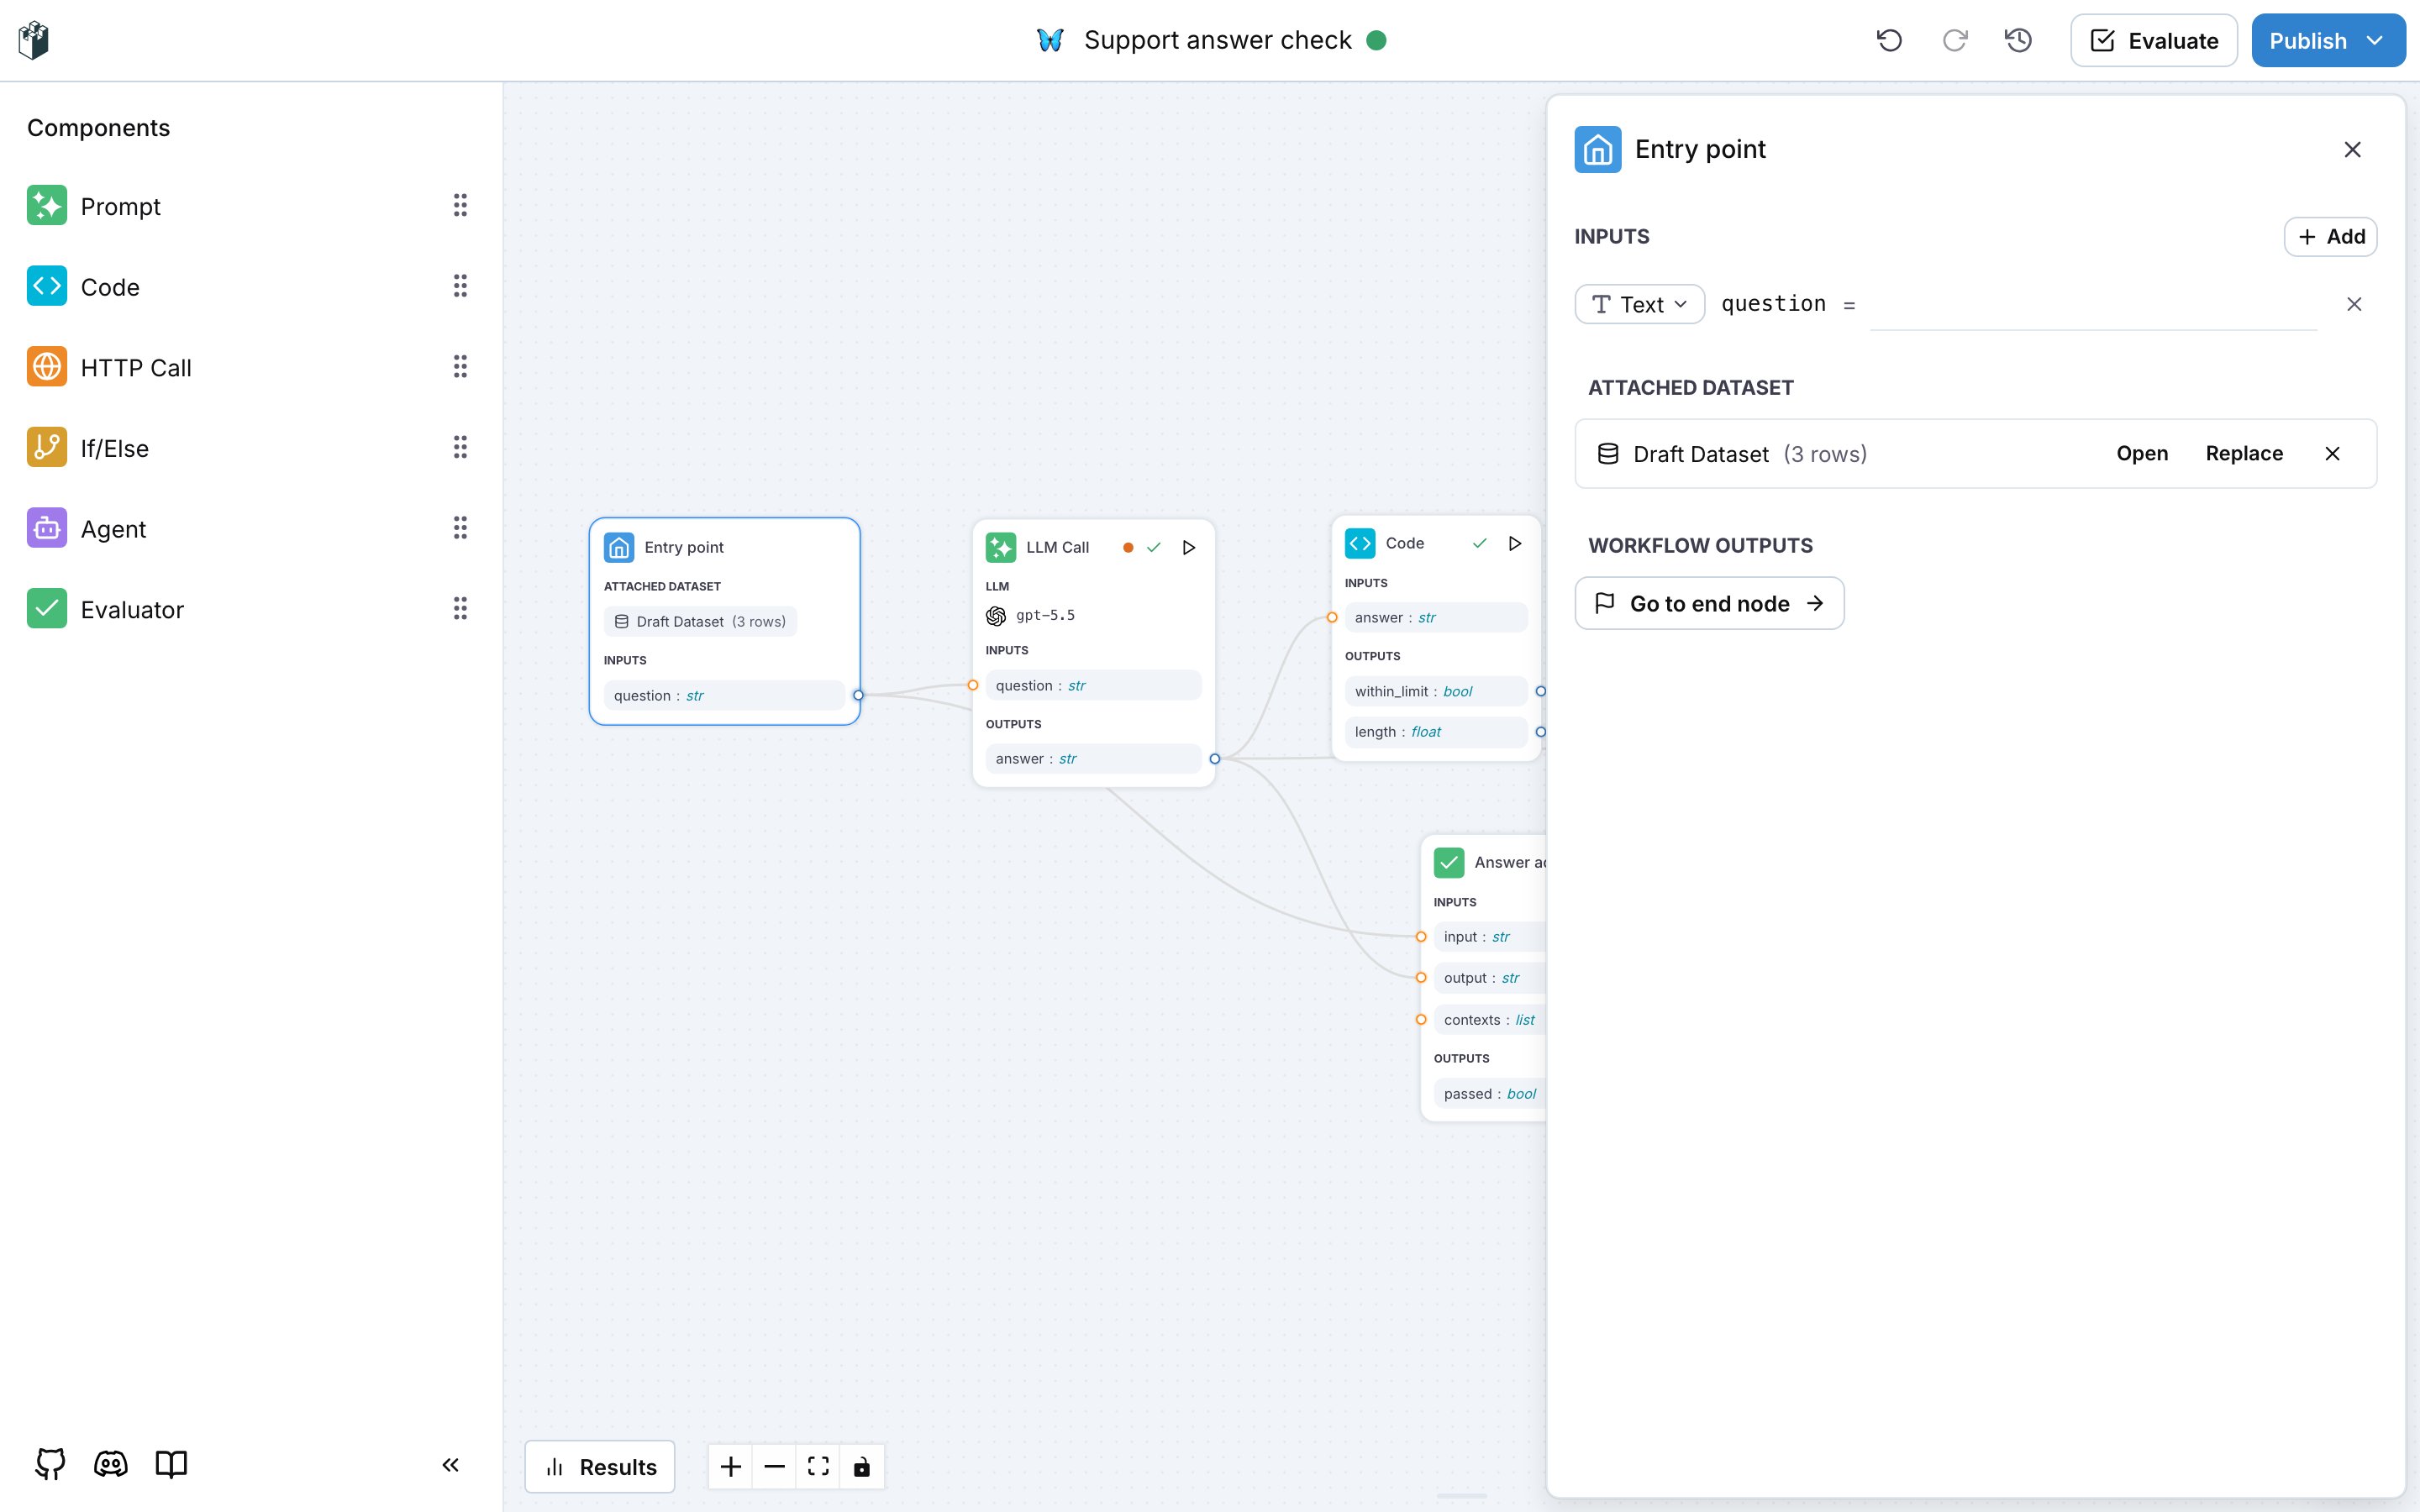
- Inputs: add one field per value the workflow receives. Each field has a type and an optional default value.
- Attached Dataset: a new workflow starts with a draft dataset. Open edits its rows and columns, Replace attaches another dataset of the project, and the cross detaches it. Attaching a dataset adds its columns to the inputs. Save as dataset in the dataset editor stores the draft under Datasets.
- Workflow Outputs: Go to end node opens the End node, which declares what the workflow returns.
LLM node
The LLM node calls a model with a prompt and returns the fields you declare as outputs.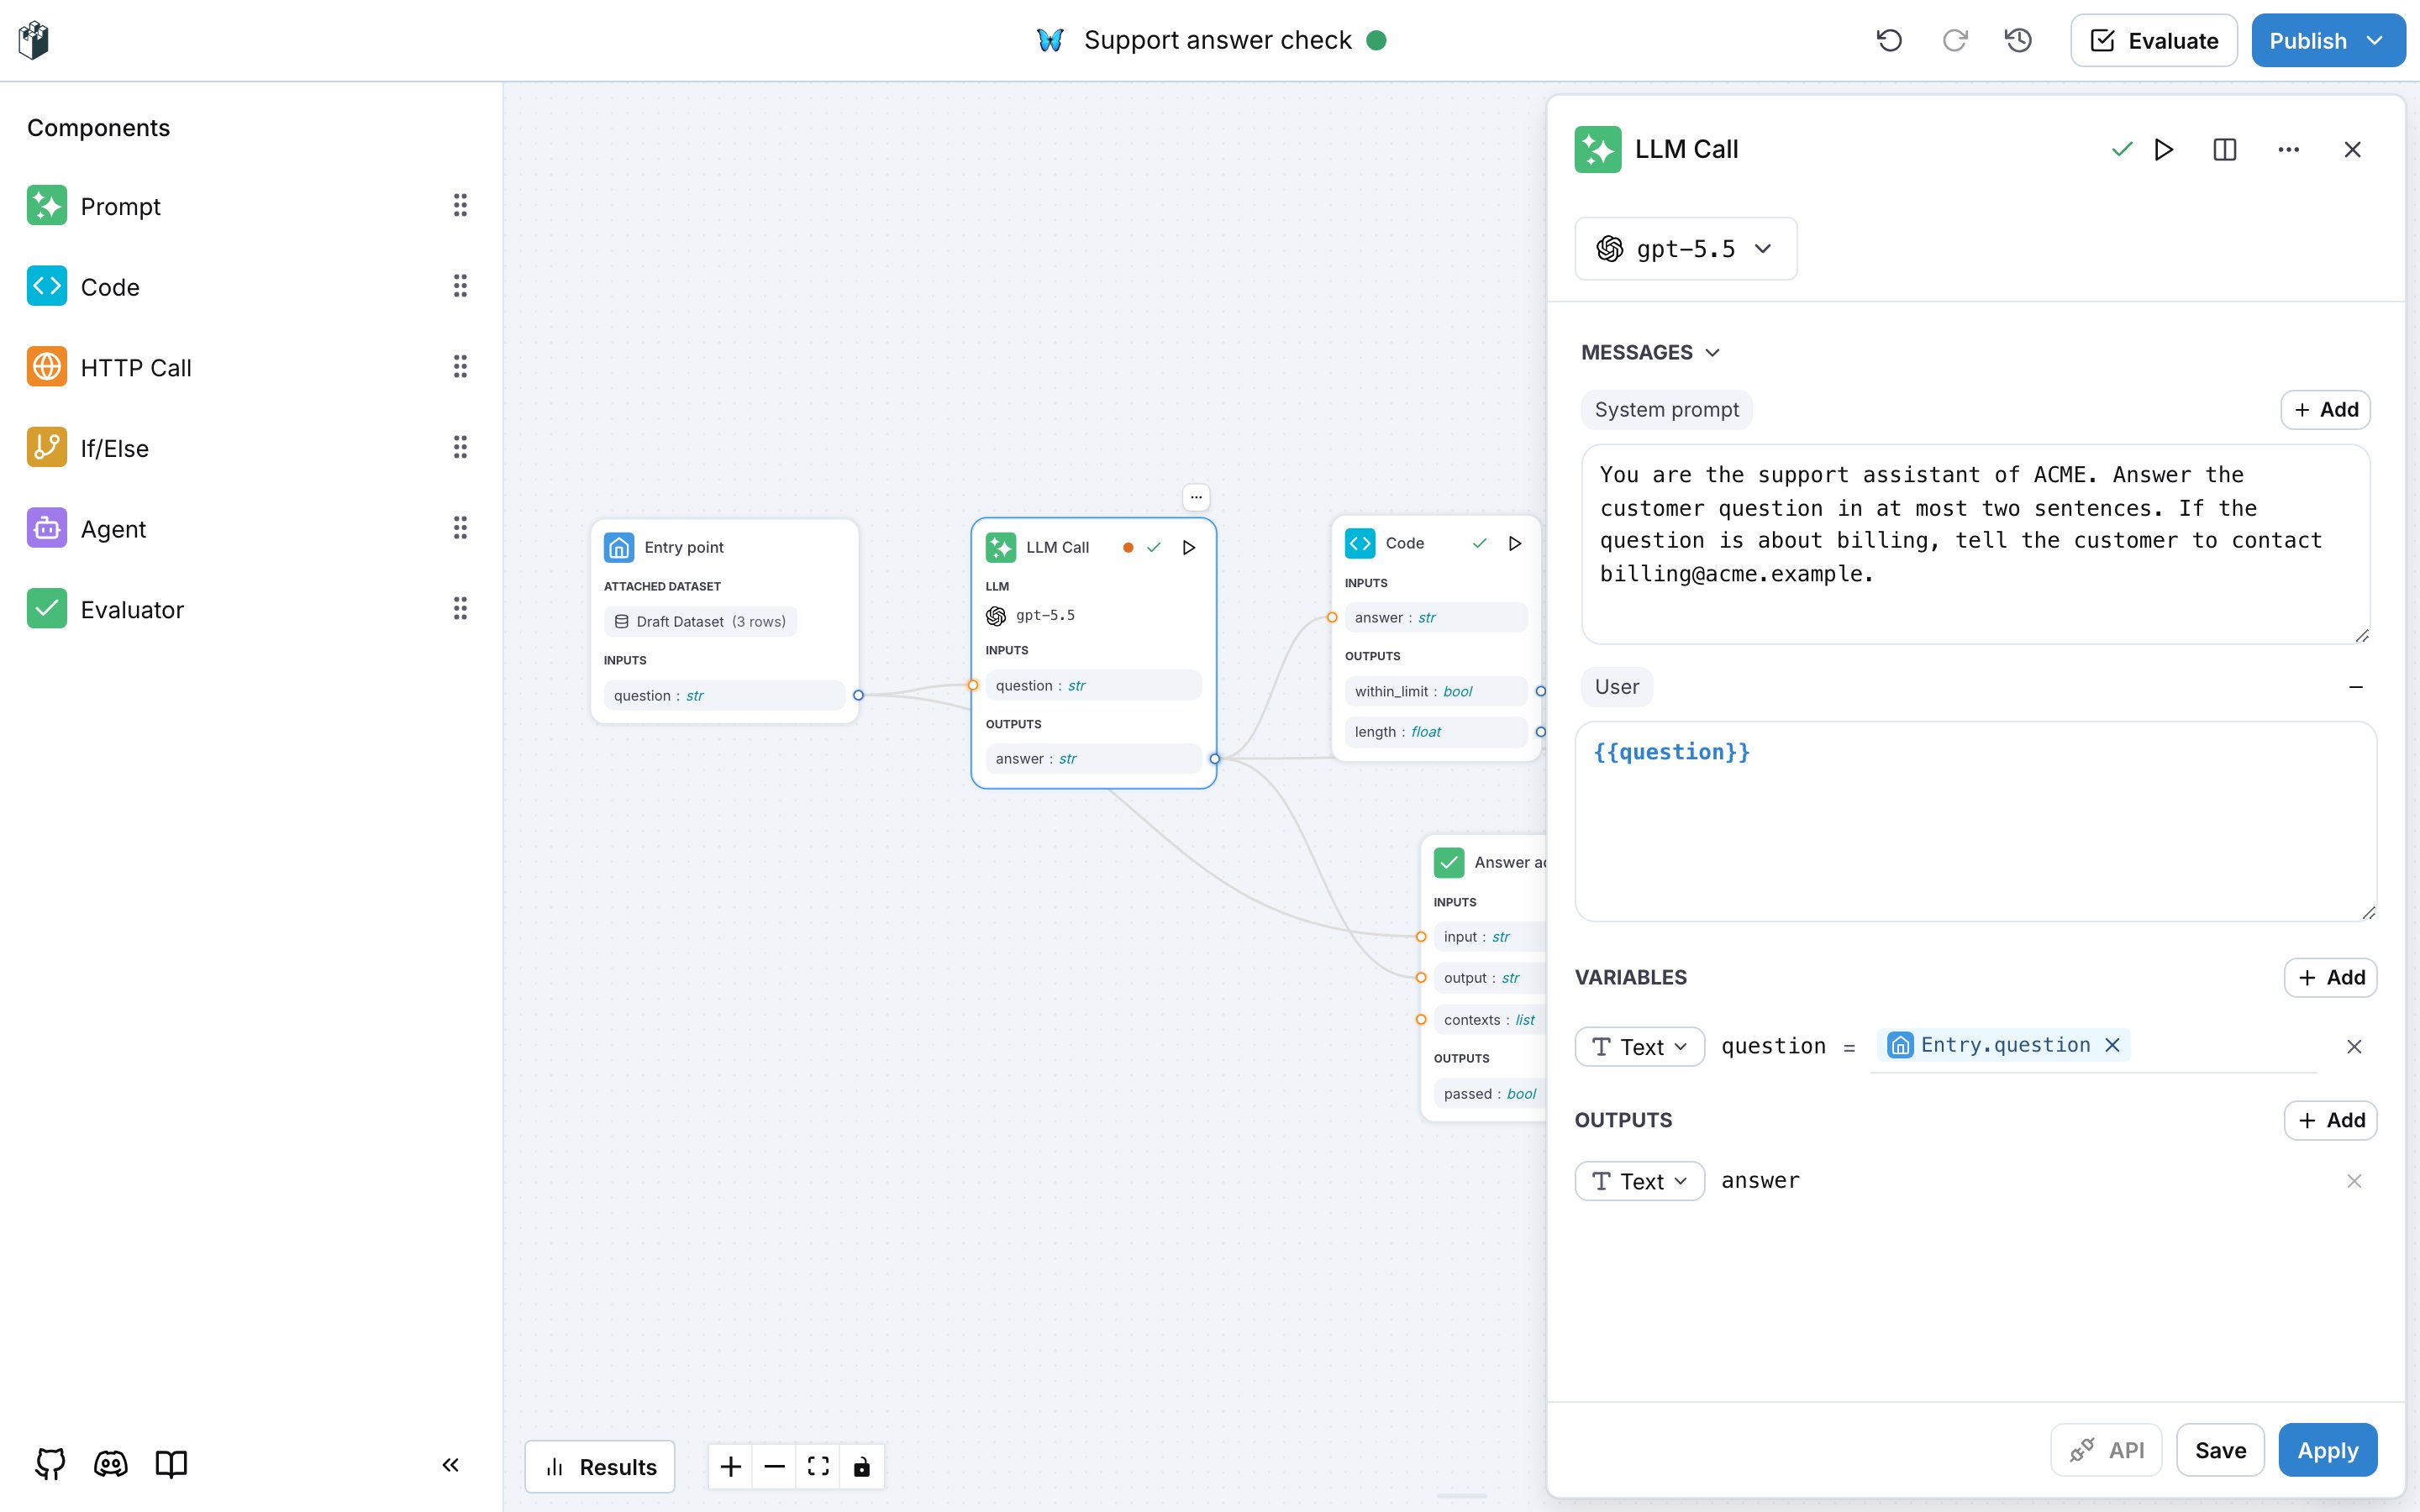
- Model: the picker at the top selects the model. The list holds the model providers configured for the project.
- Prompt: the view switch next to the section title shows either the system prompt alone (Prompt) or the full message list (Messages). Write
{{name}}in a message to insert a variable. A variable used in a message but not declared shows an Undefined variables notice with a Create action. - Variables: one row per input of the node, each with a type and a mapping to the source it reads from, for example
Entry.question. - Outputs: one row per field the model returns. With one output of type Text the node returns the model answer as is. With several outputs, or an output of another type, the node asks the model for structured output with those fields.
Code node
The Code node runs a Python class. The__call__ method receives one keyword argument per input and returns a dictionary with one key per output.
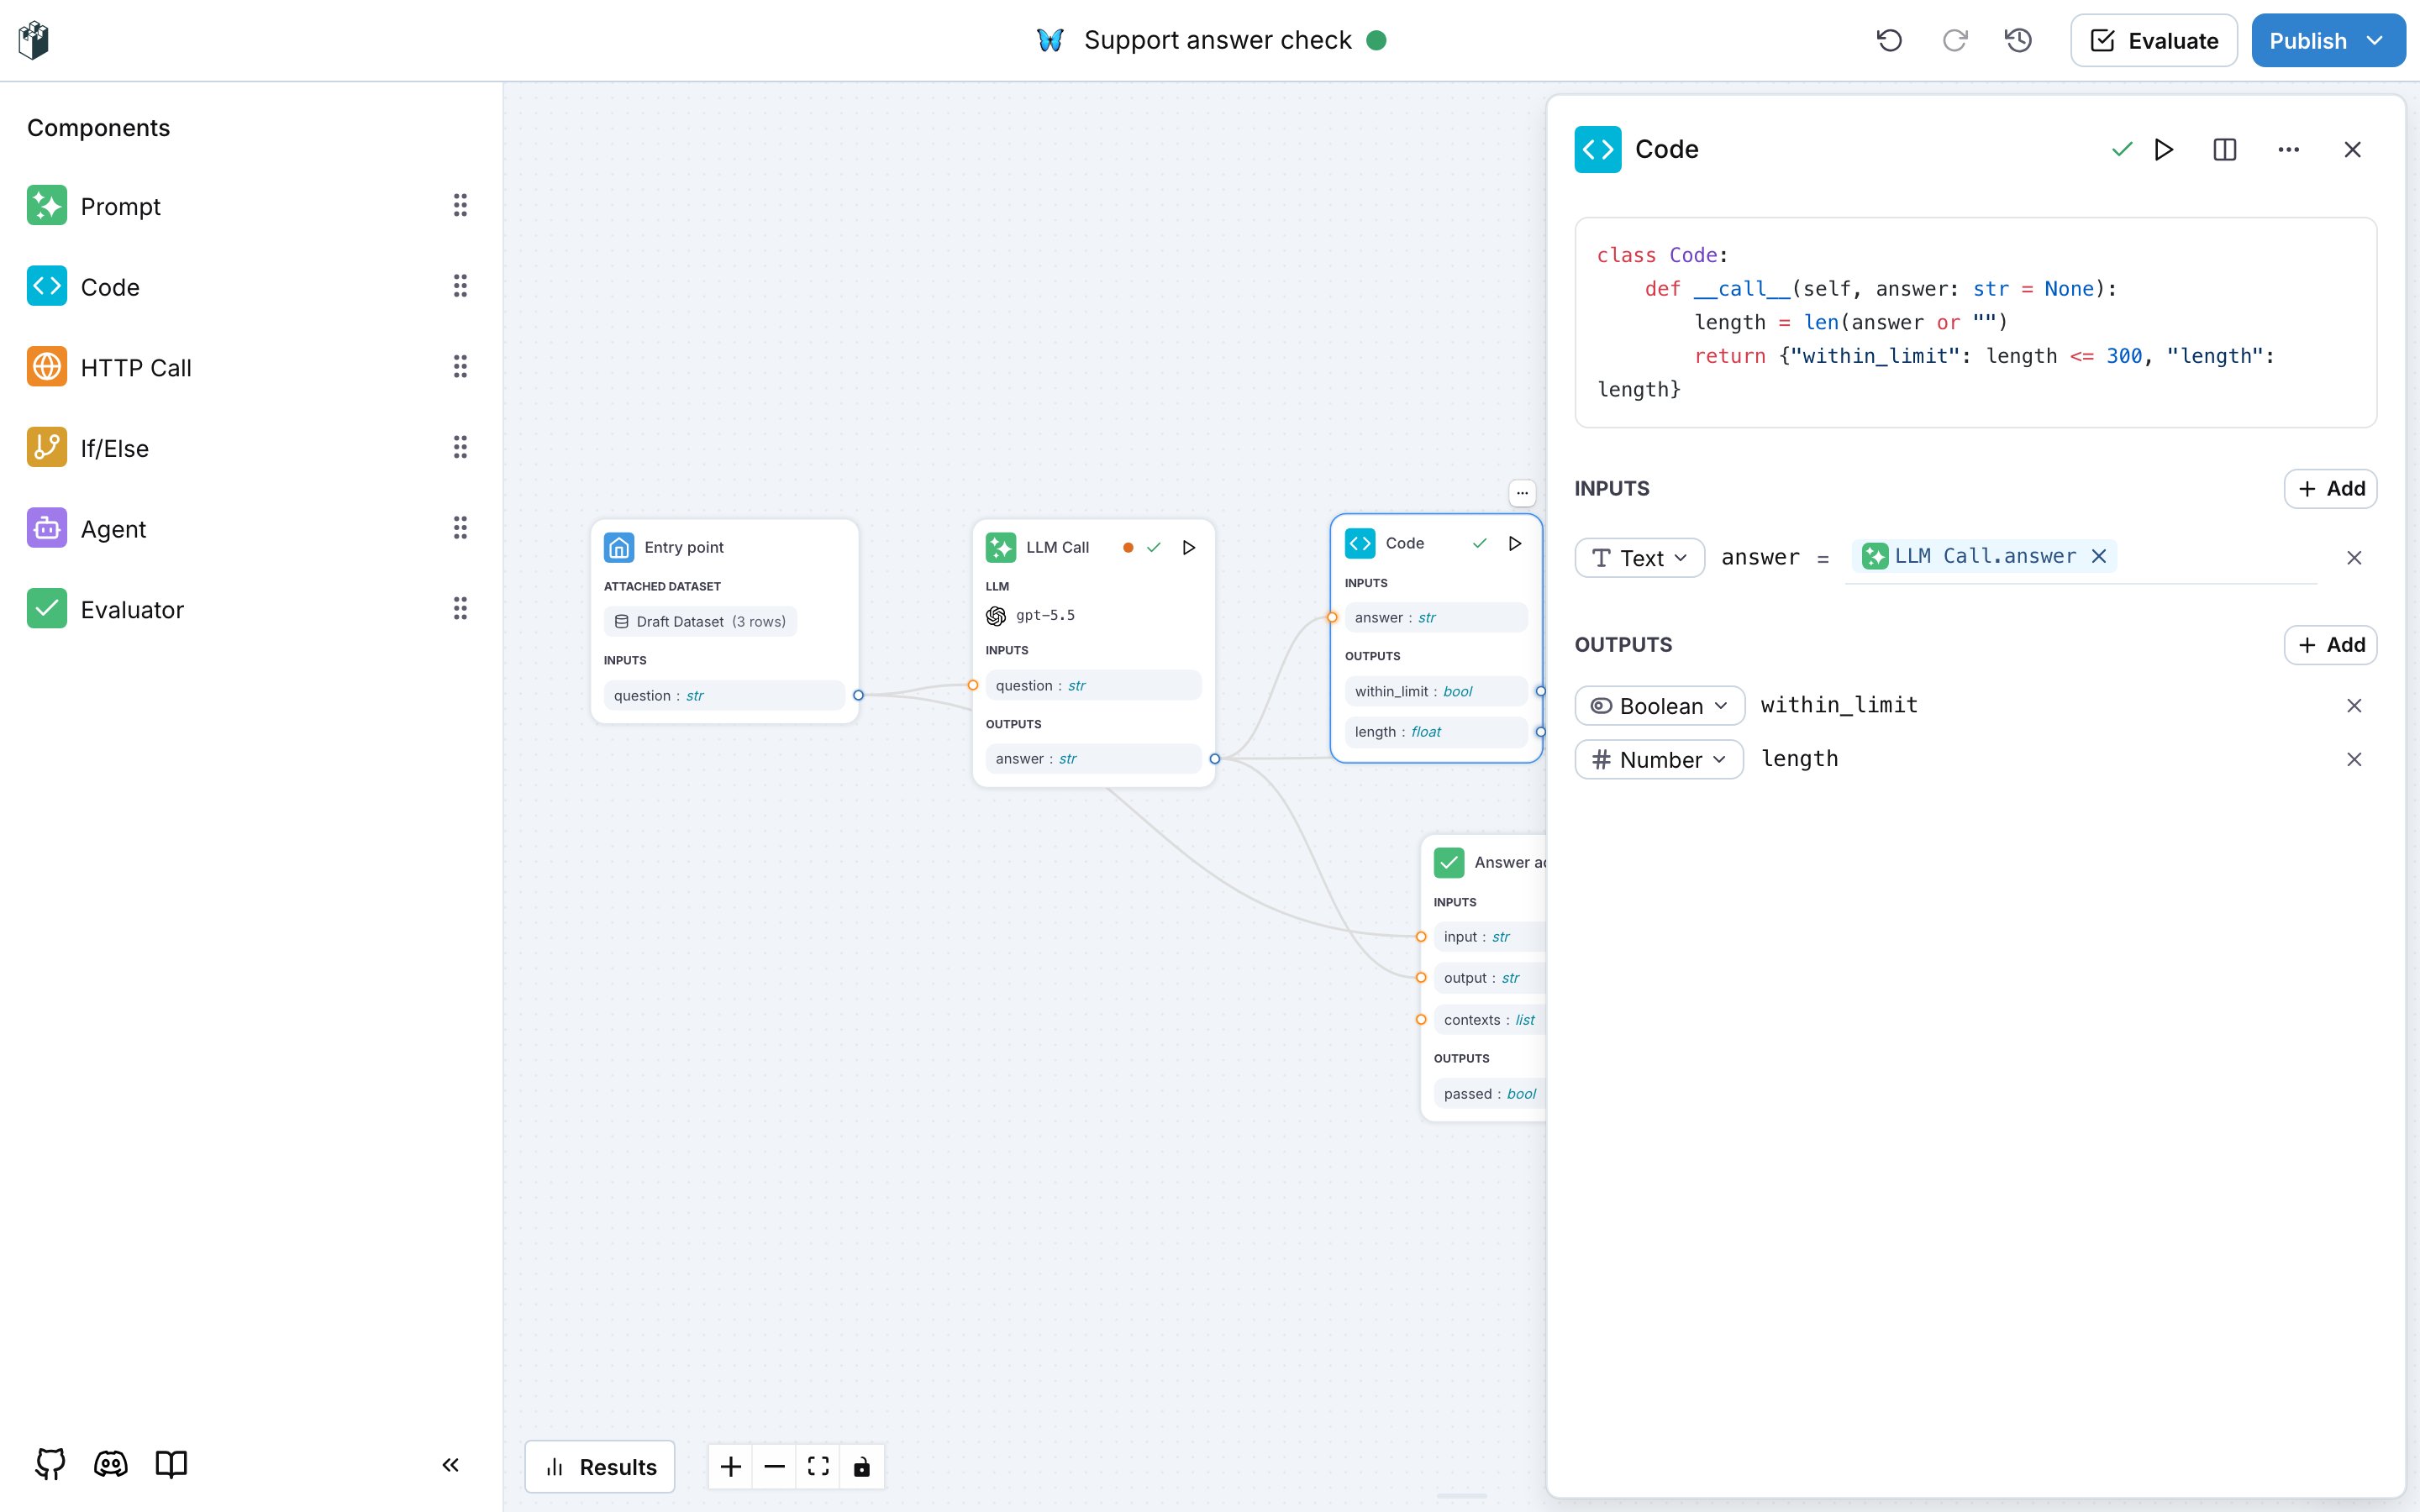
- Inputs and Outputs work as on the LLM node. Adding an input also adds the parameter to the
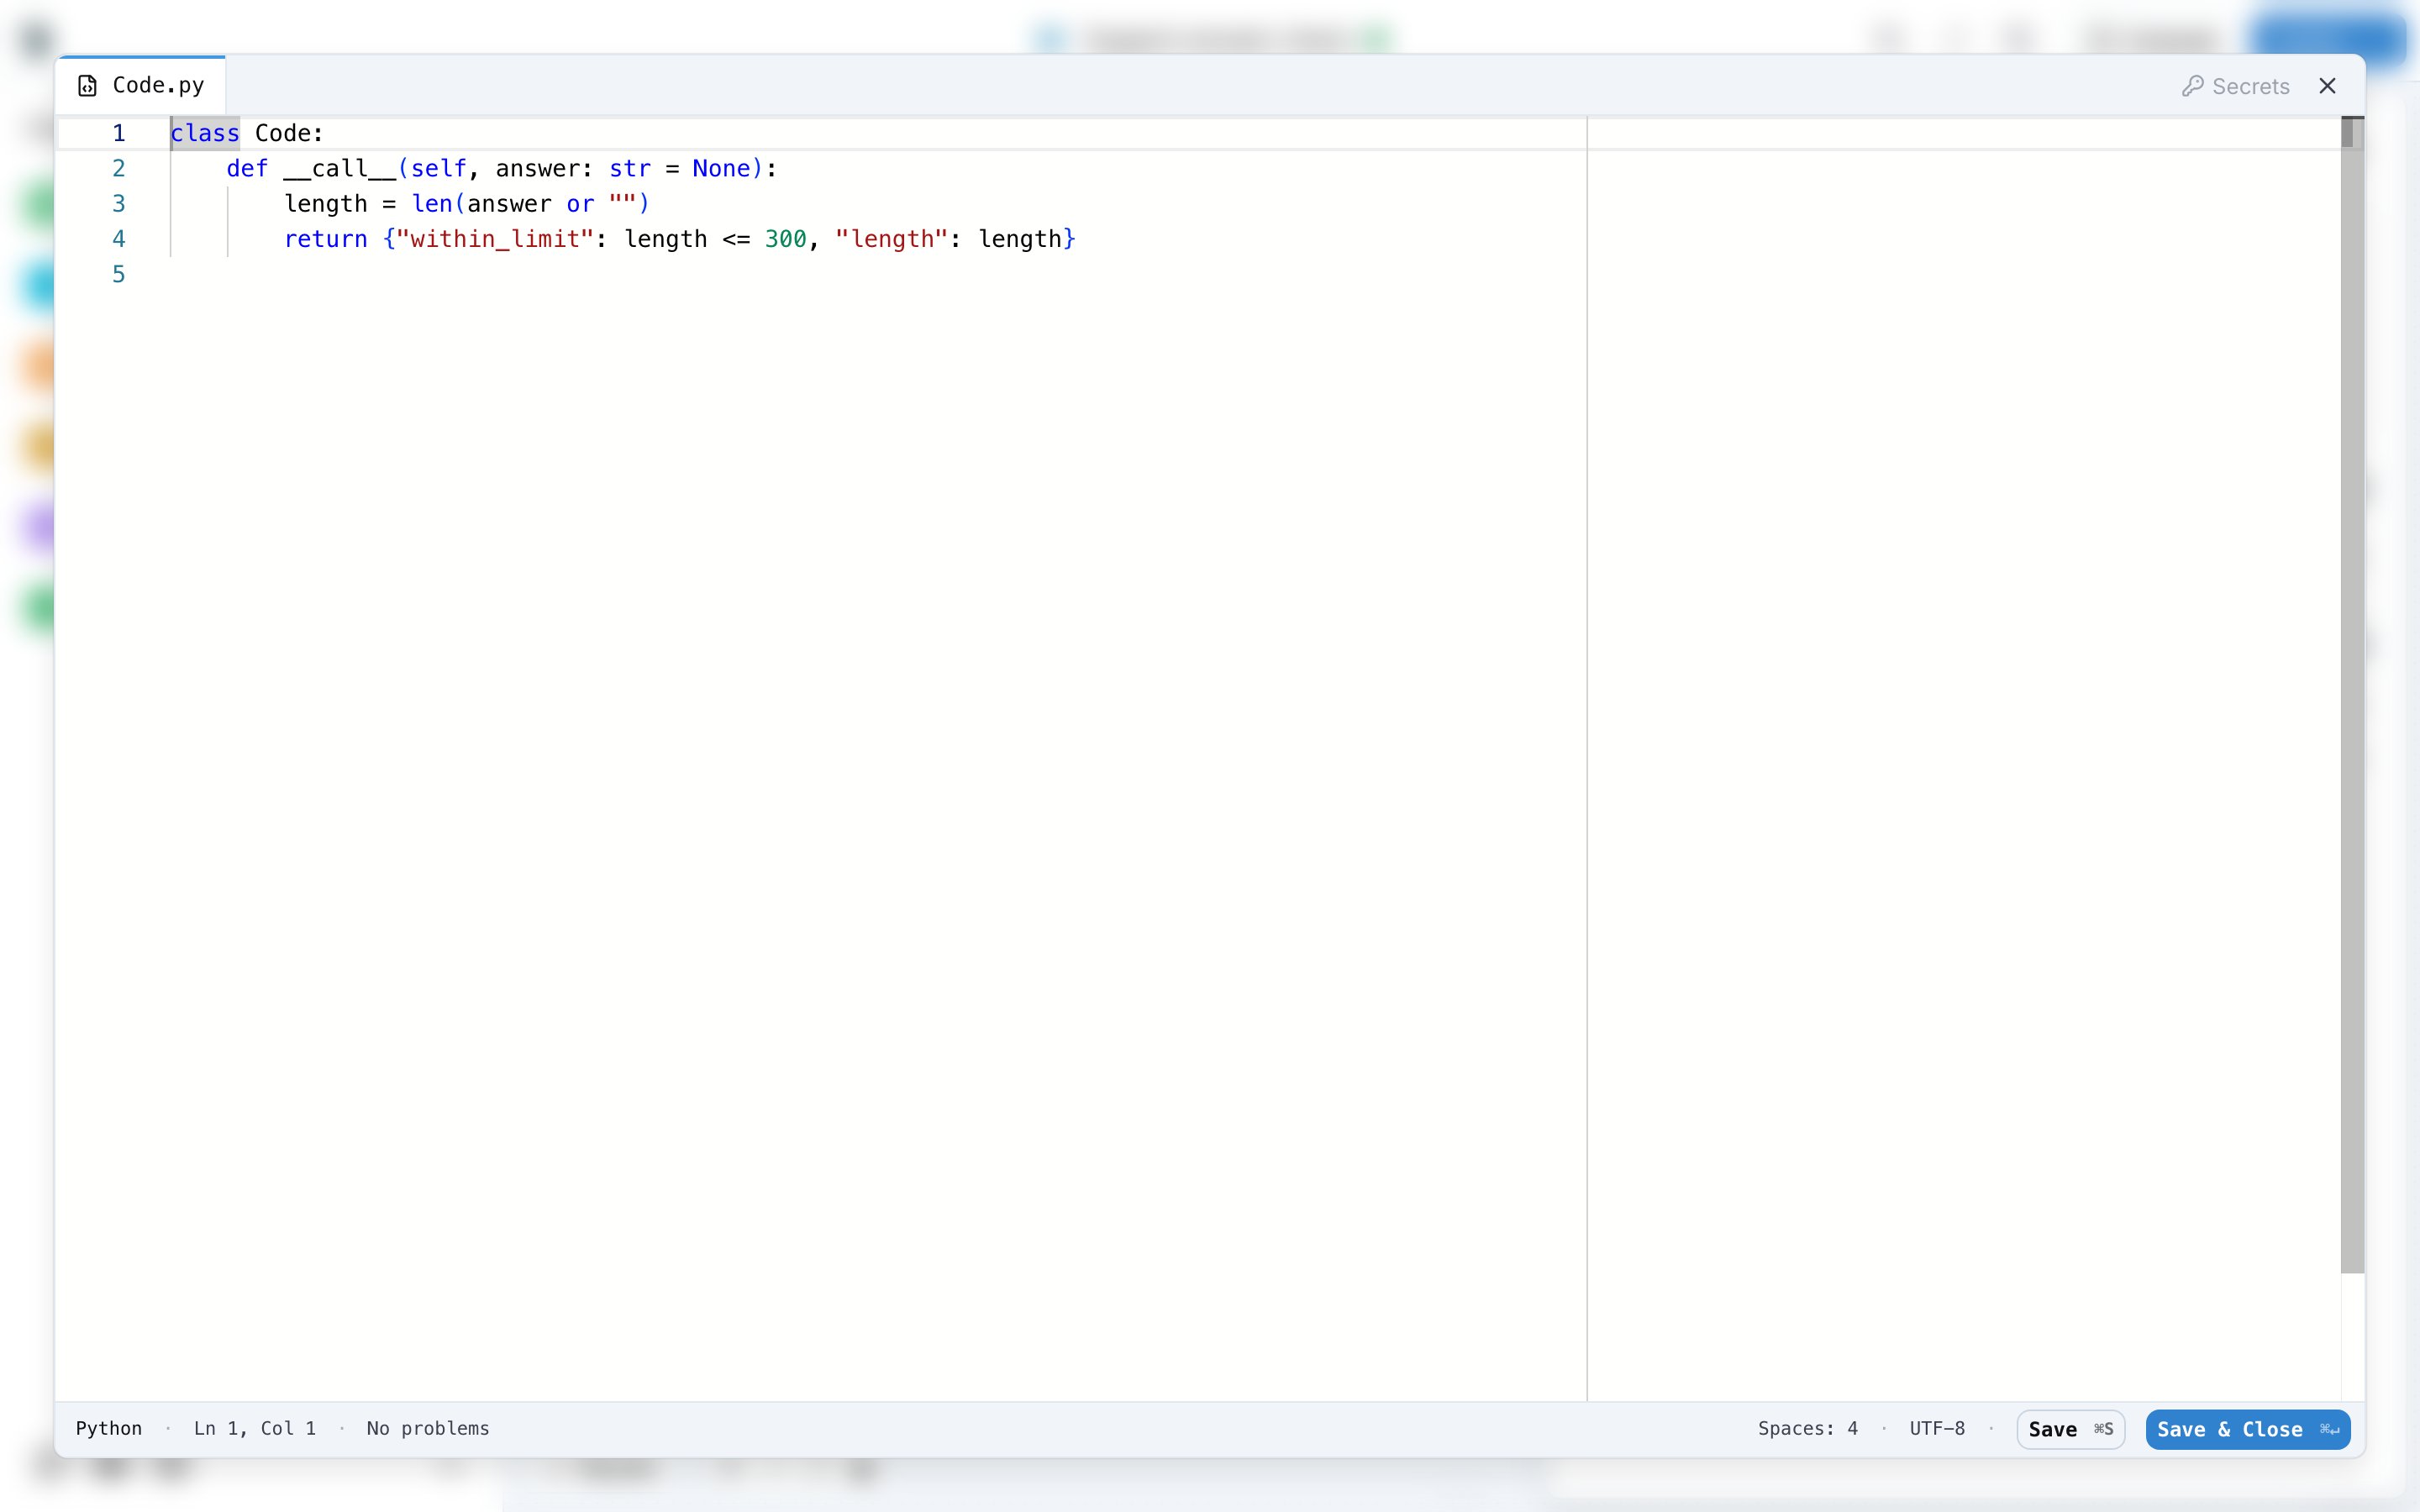
__call__signature. Every parameter defaults toNone, so an input that is not connected does not raise an error. - Click the source to open the code editor. Save keeps the editor open, Save & Close returns to the drawer.
- Secrets: the editor lists the secrets of the project and inserts
secrets.NAMEat the cursor. The value reaches the code at run time only; the editor and the saved workflow hold the name. Manage the values under Settings, Secrets, described in Secrets.
Evaluator node
The Evaluator node runs an evaluator of the project on the values you map to it and outputspassed, score or label, depending on the evaluator type.
Dragging Evaluator onto the canvas opens the evaluator picker. Pick an existing evaluator, or click New Evaluator and choose a type from the categories (Expected Answer, LLM as Judge, RAG Quality, Quality Aspects, Safety, Custom). The evaluator is saved to the project and the node references it.
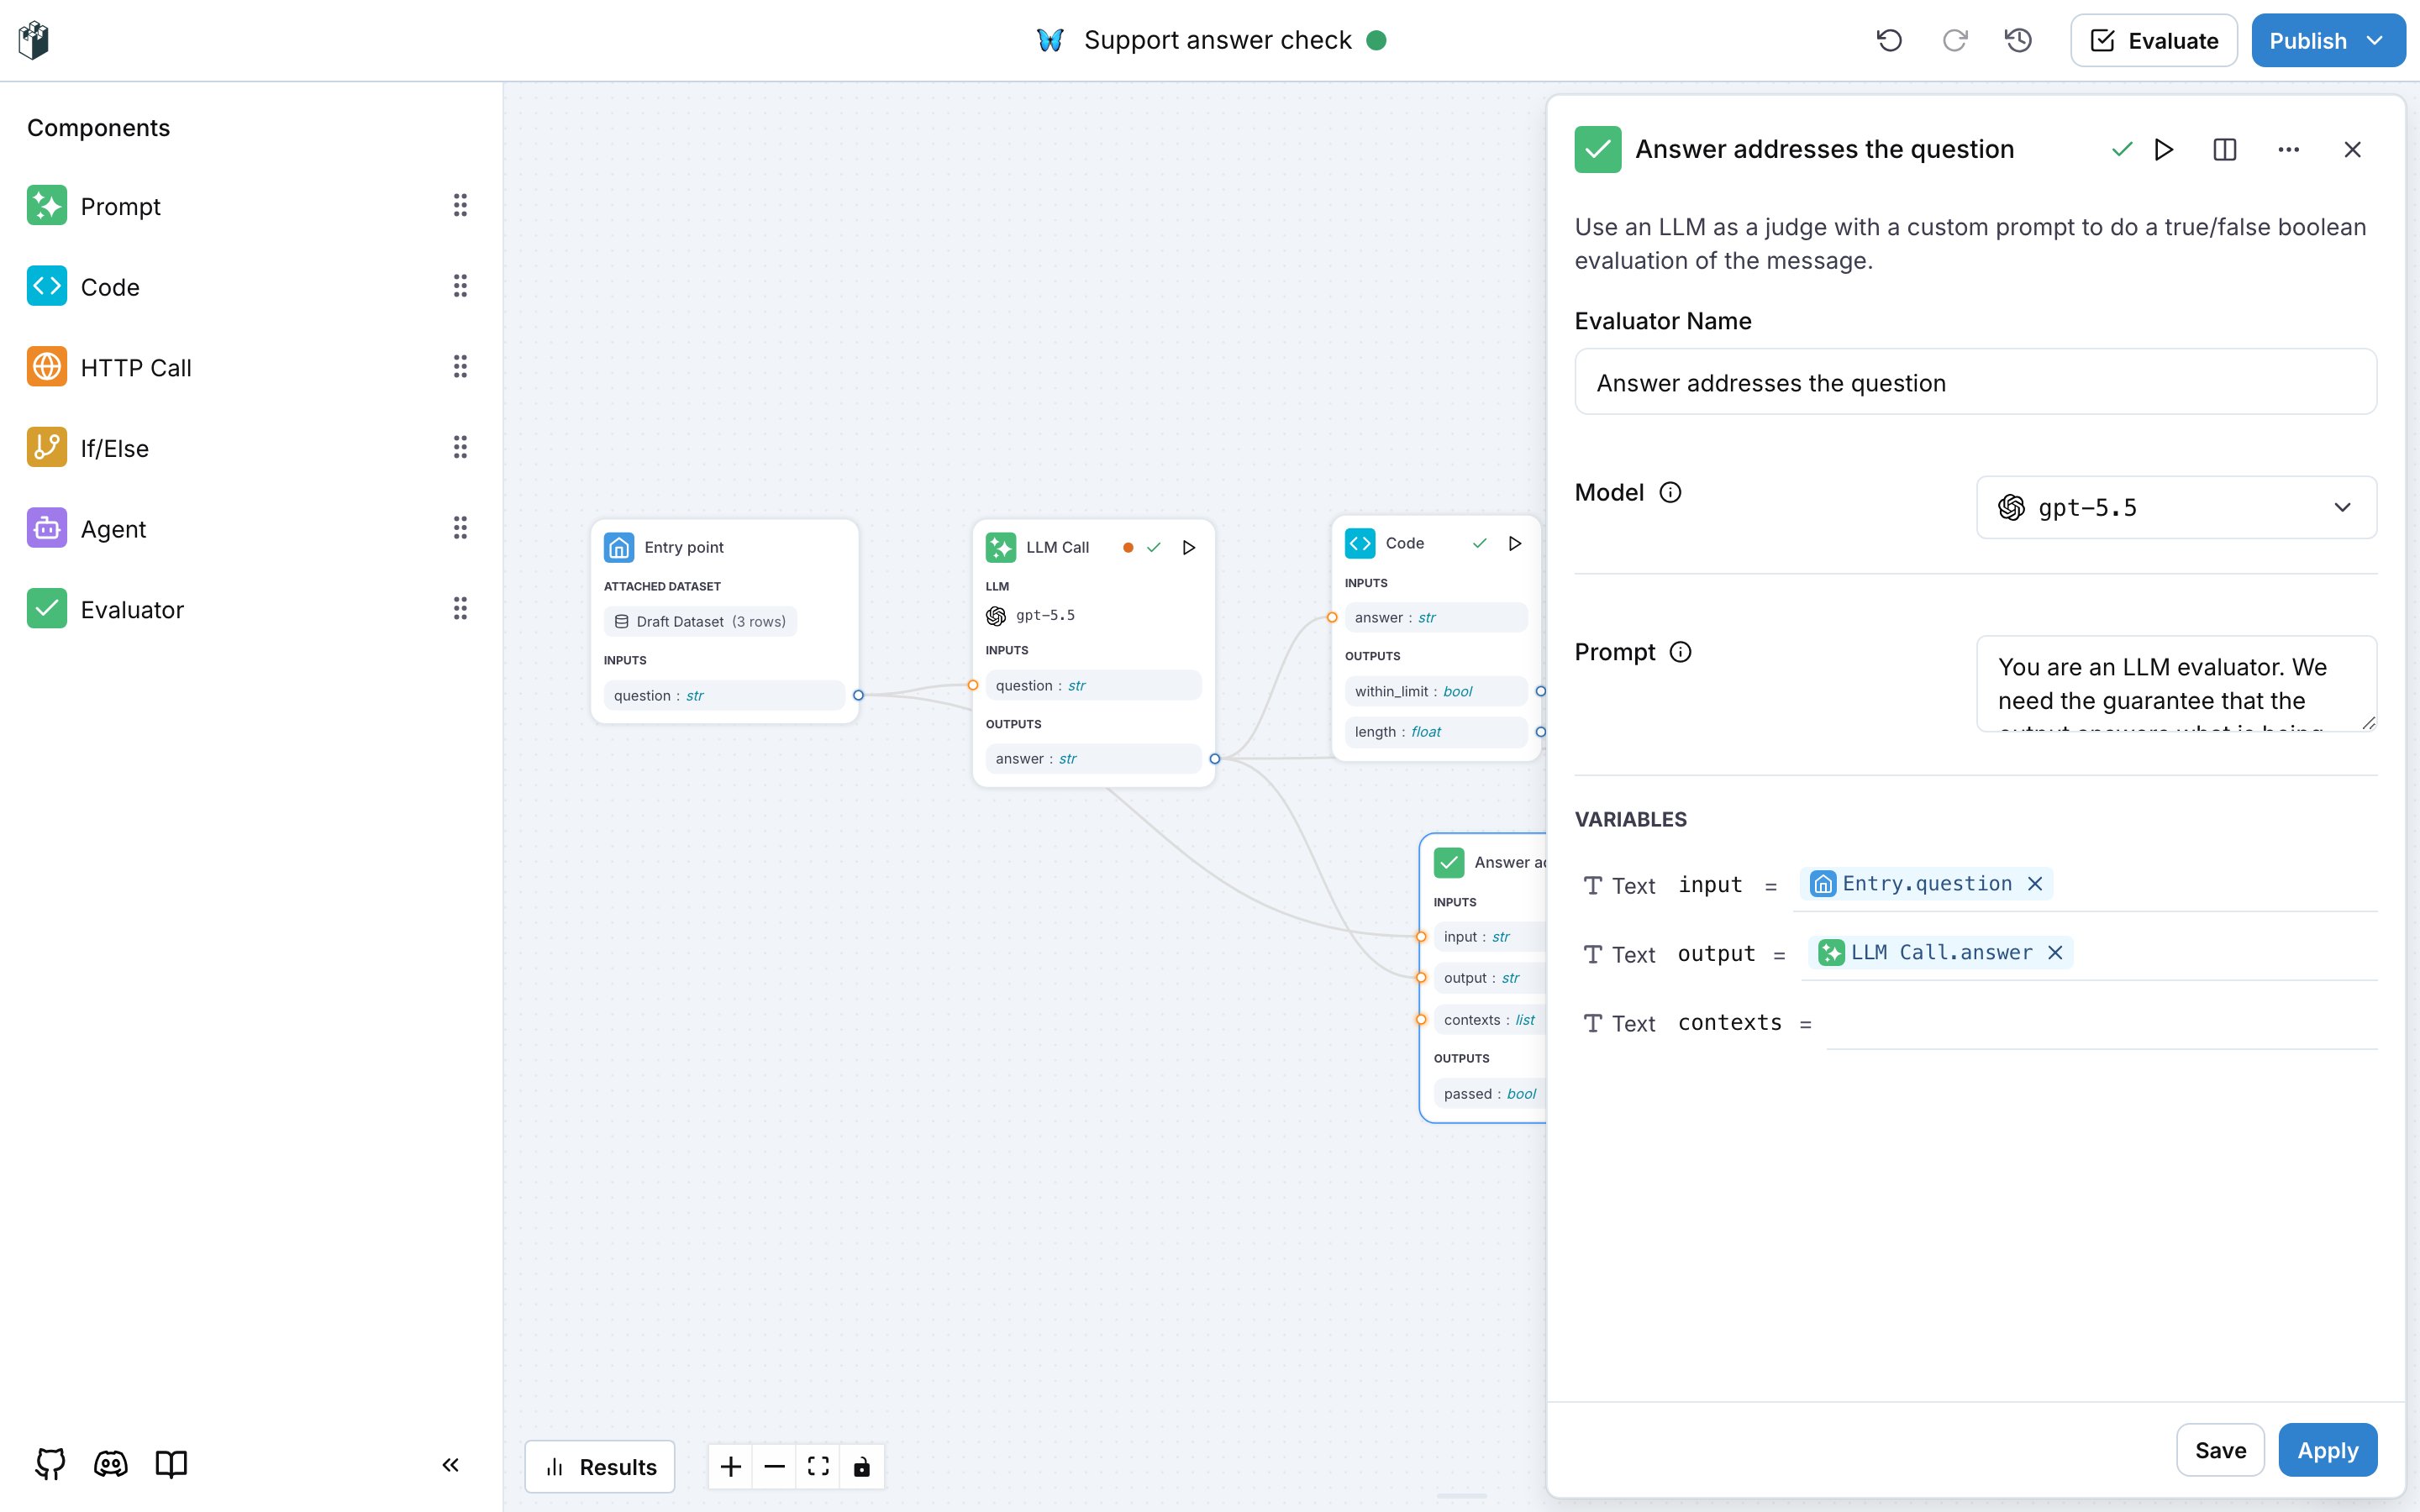
- The drawer shows the settings of the evaluator type, for example the model and the prompt of an LLM judge.
- Variables: map
input,output,expected_outputorcontextsto the entry inputs or to the outputs of earlier nodes. Only the fields the evaluator uses are required. - Apply keeps the changes on this node only. Save updates the saved evaluator for every place that uses it.
End node
The End node declares the results of the workflow. Add one result per value the workflow returns, with its type, and connect an output of an earlier node to each one.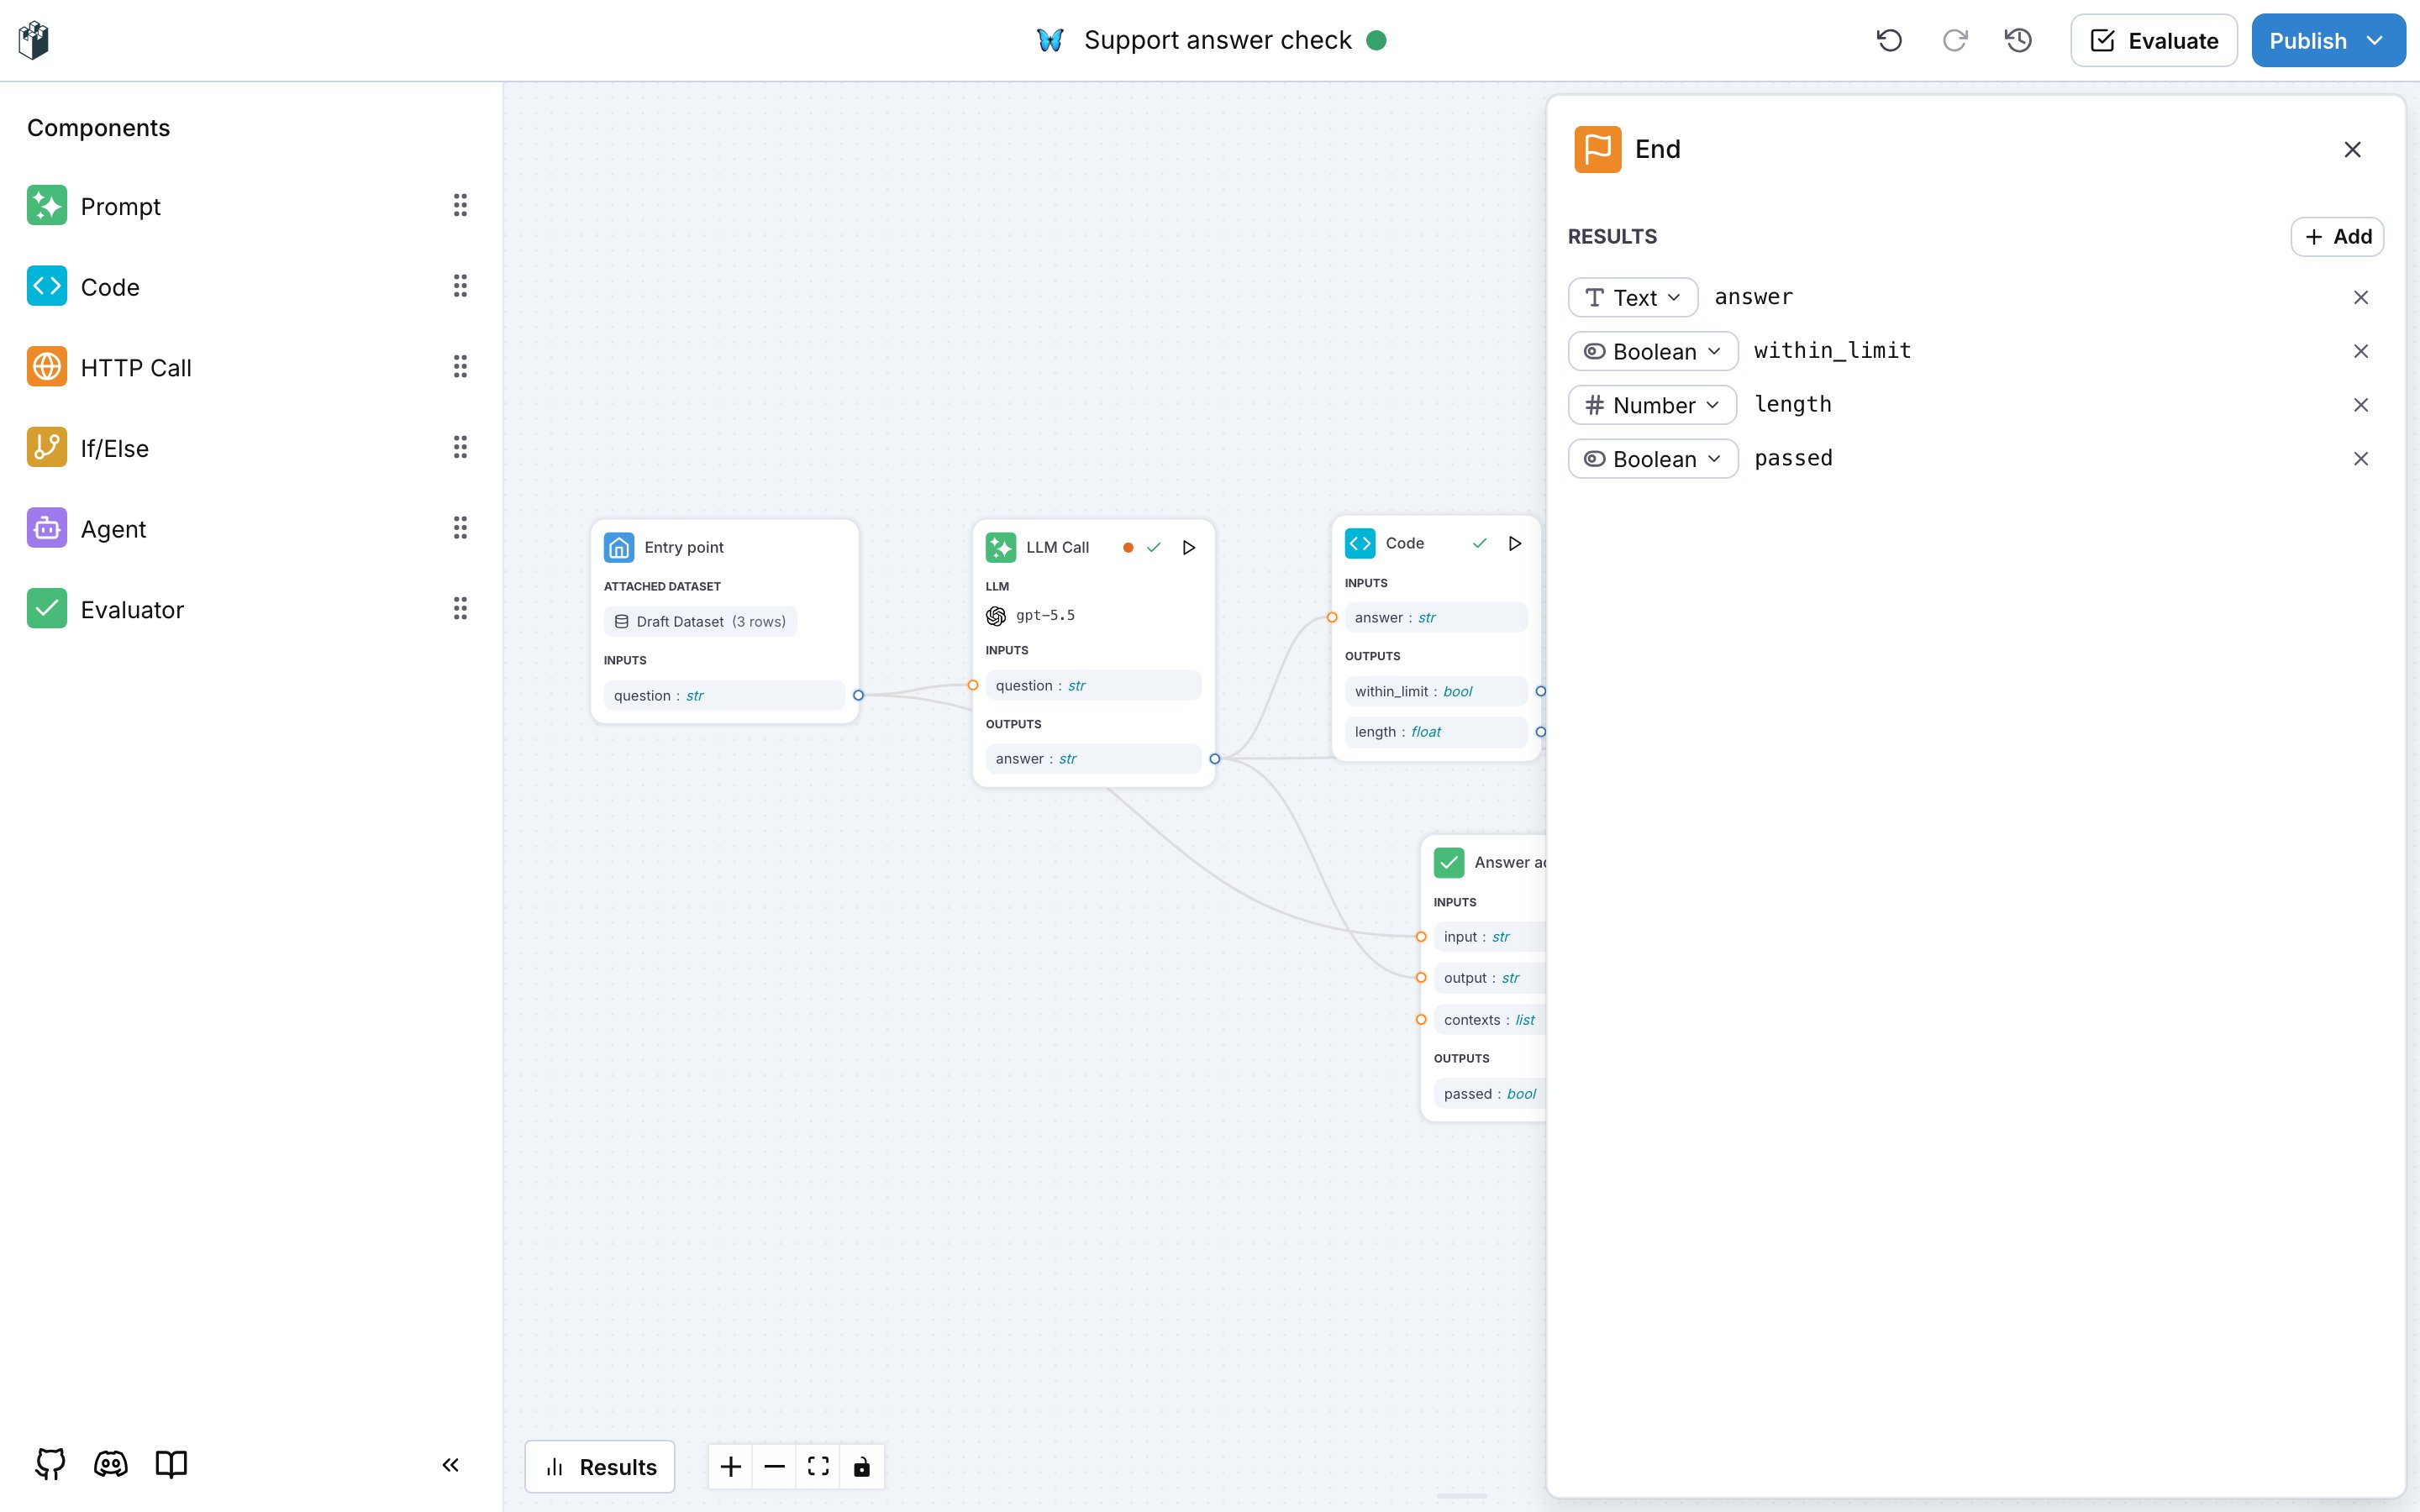
details, passed, score and label. See Workflow as evaluator.
Run one input
The play button on a node opens two options:- Run with manual input runs this node alone. A form asks for a value per input of the node.
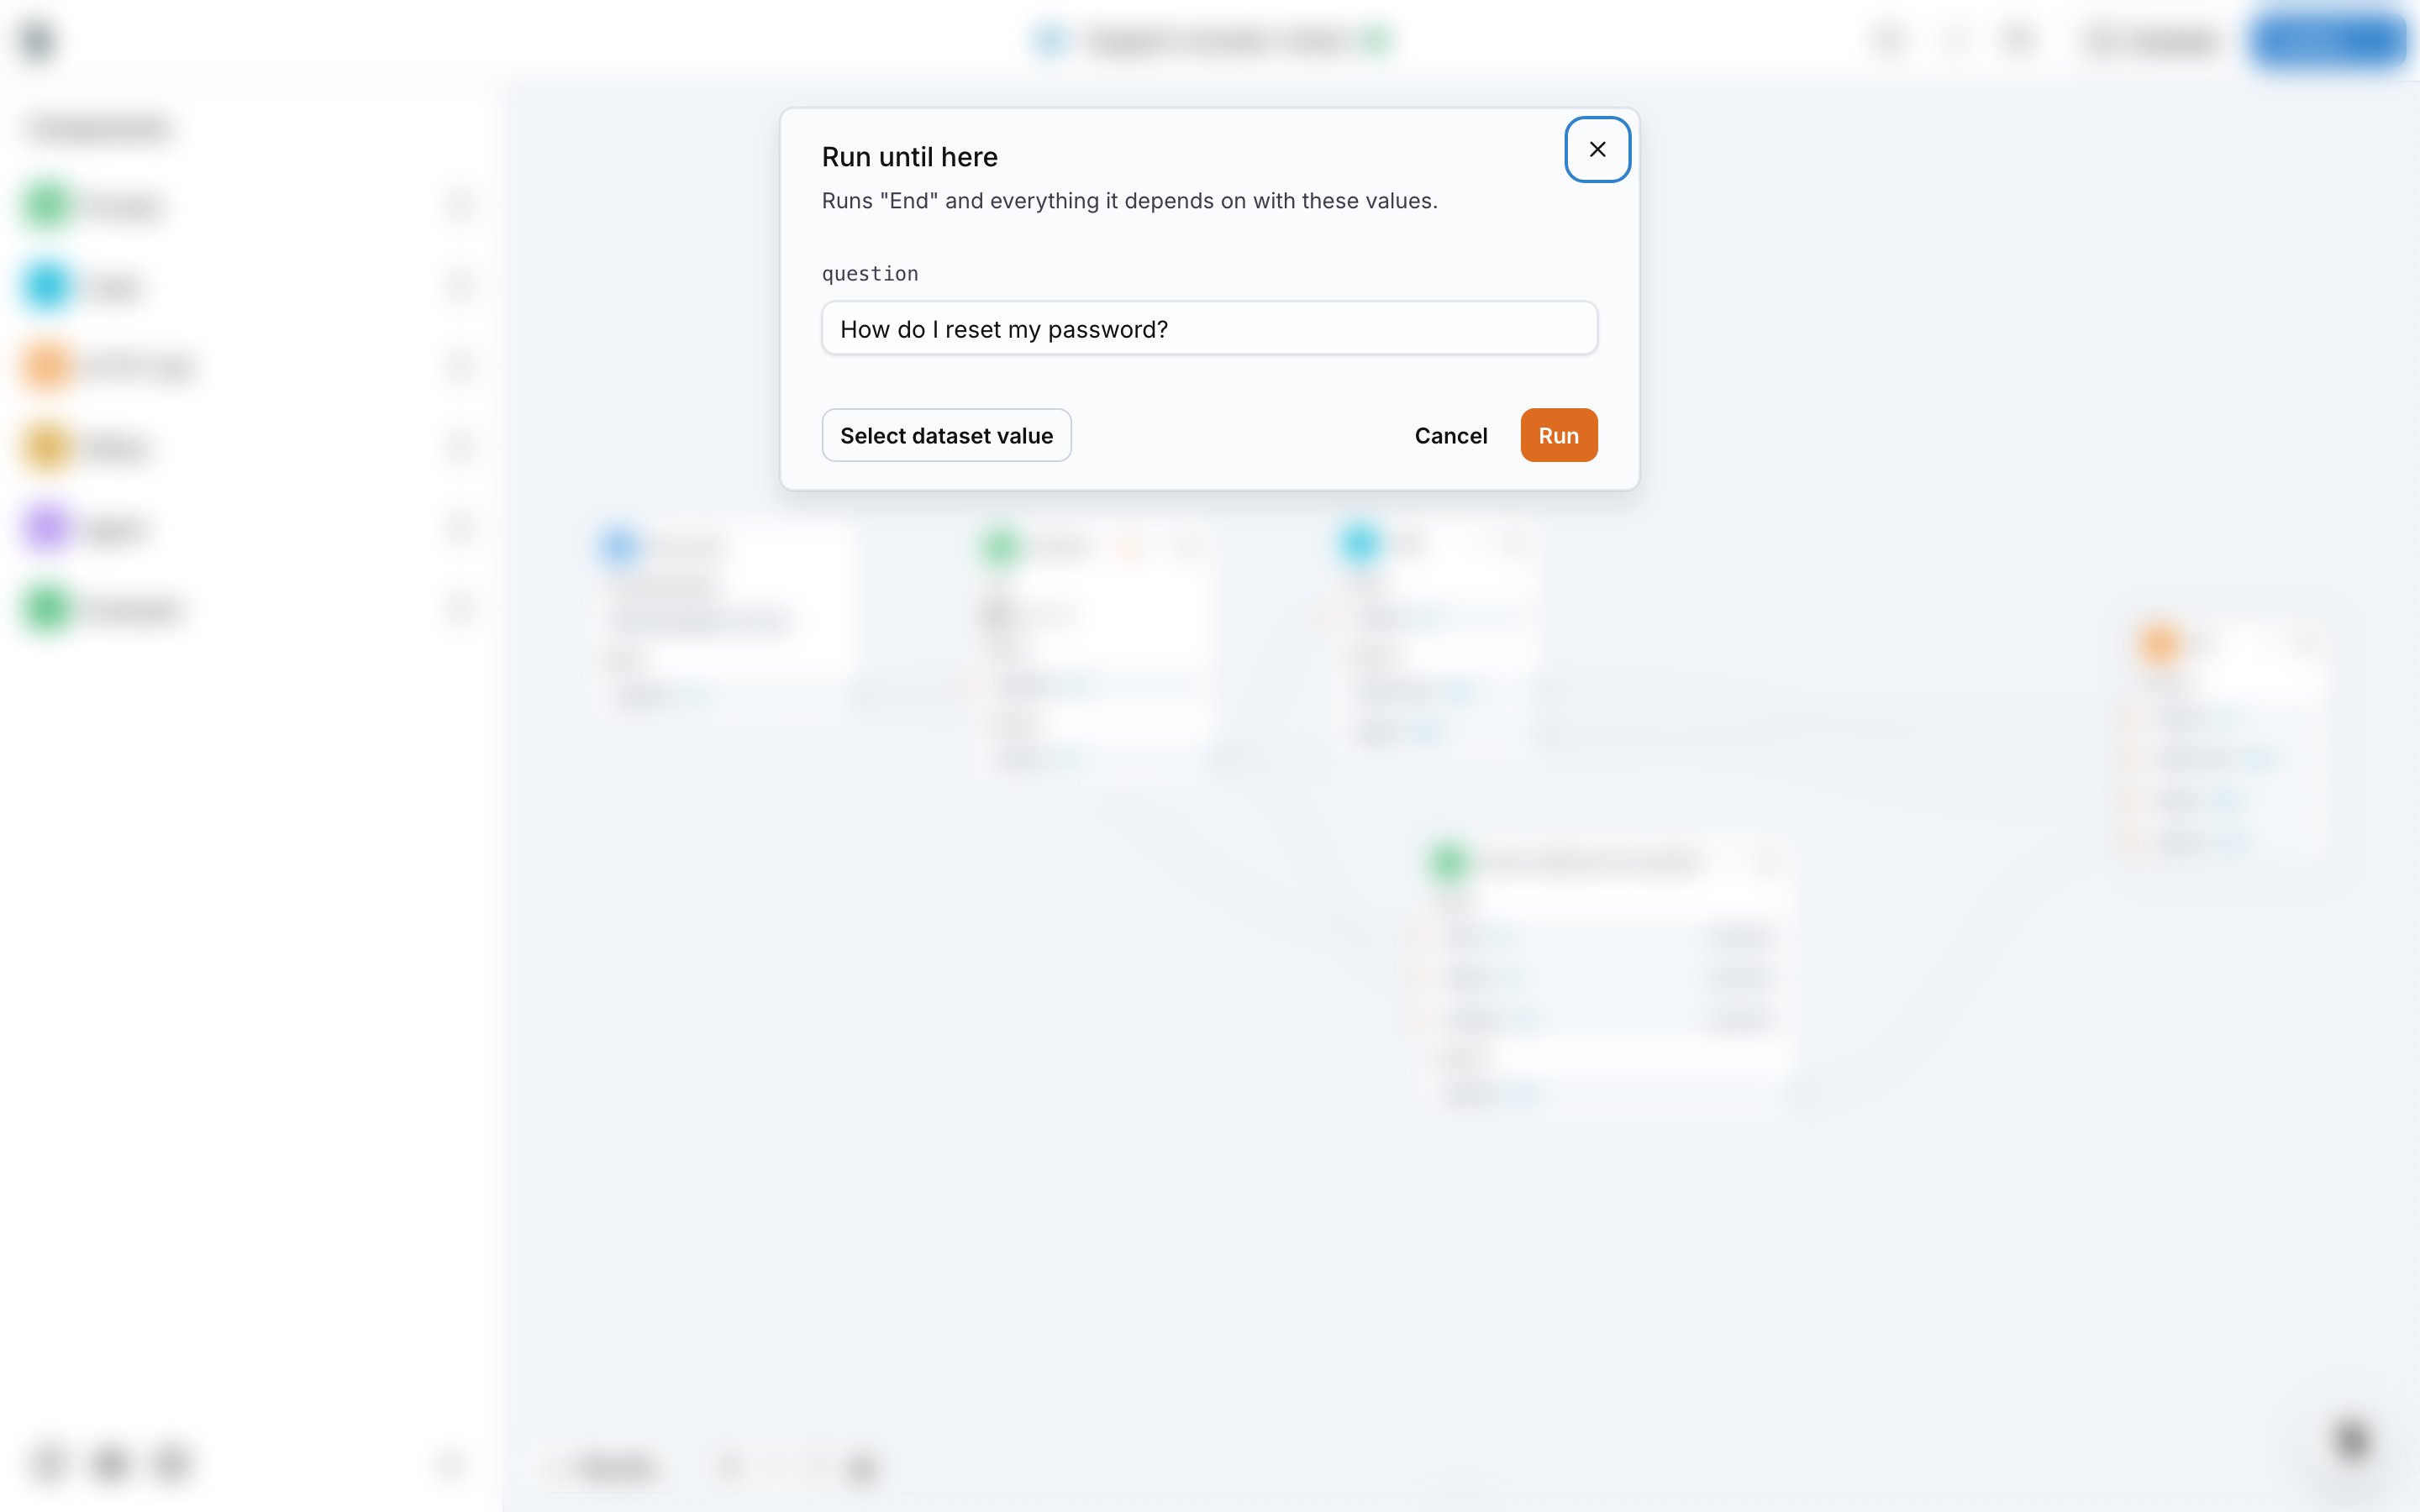
- Run workflow until here runs this node and everything it depends on. The Run until here dialog shows one field per Entry point input, prefilled with the first dataset row or with the values of your last run. Select dataset value picks a row of the attached dataset instead.
Read the result of a node
Click a node after a run to see what it received and what it produced. The expanded view shows the inputs on the left, the settings in the middle and the outputs on the right, with the duration of the run. Full Trace opens the trace of the run in the Trace Explorer, with every model call, its cost and its messages.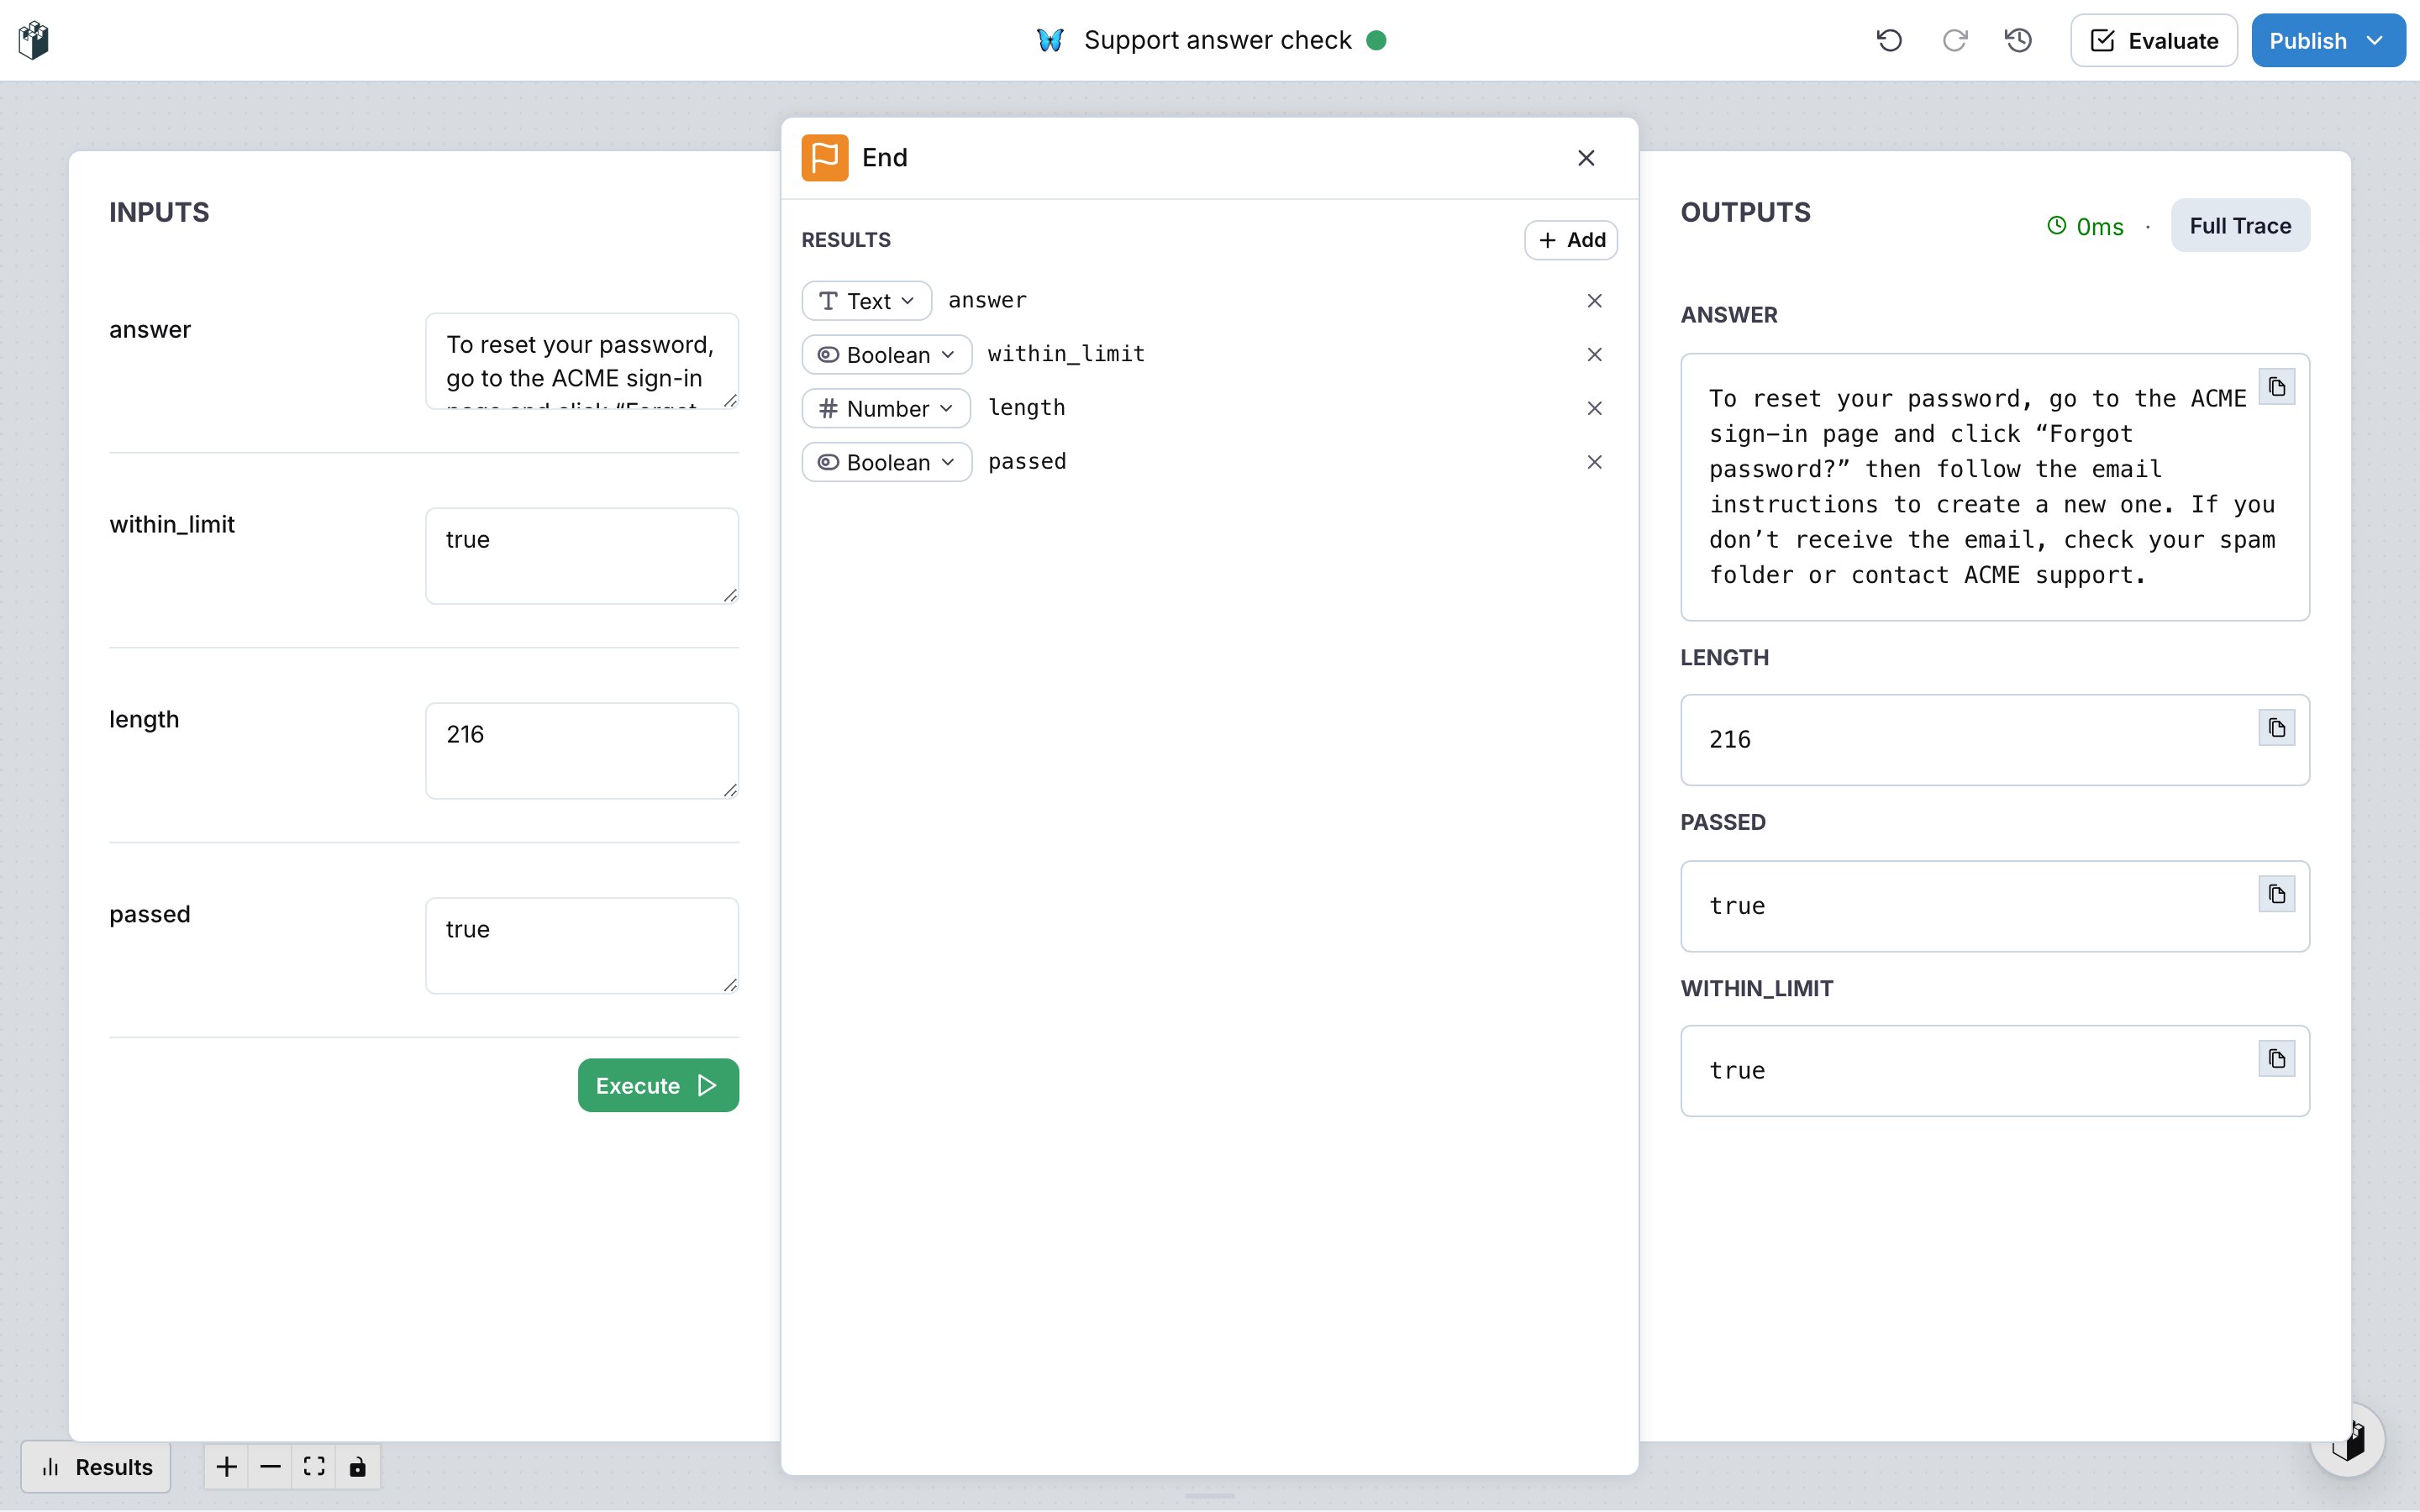
Evaluate on a dataset
Evaluate runs the workflow on every row of the attached dataset and records the outputs of the evaluator nodes. The dialog asks for a description of the version it saves, and for the rows to evaluate: Full dataset, Test entries, Train entries or Specific entry.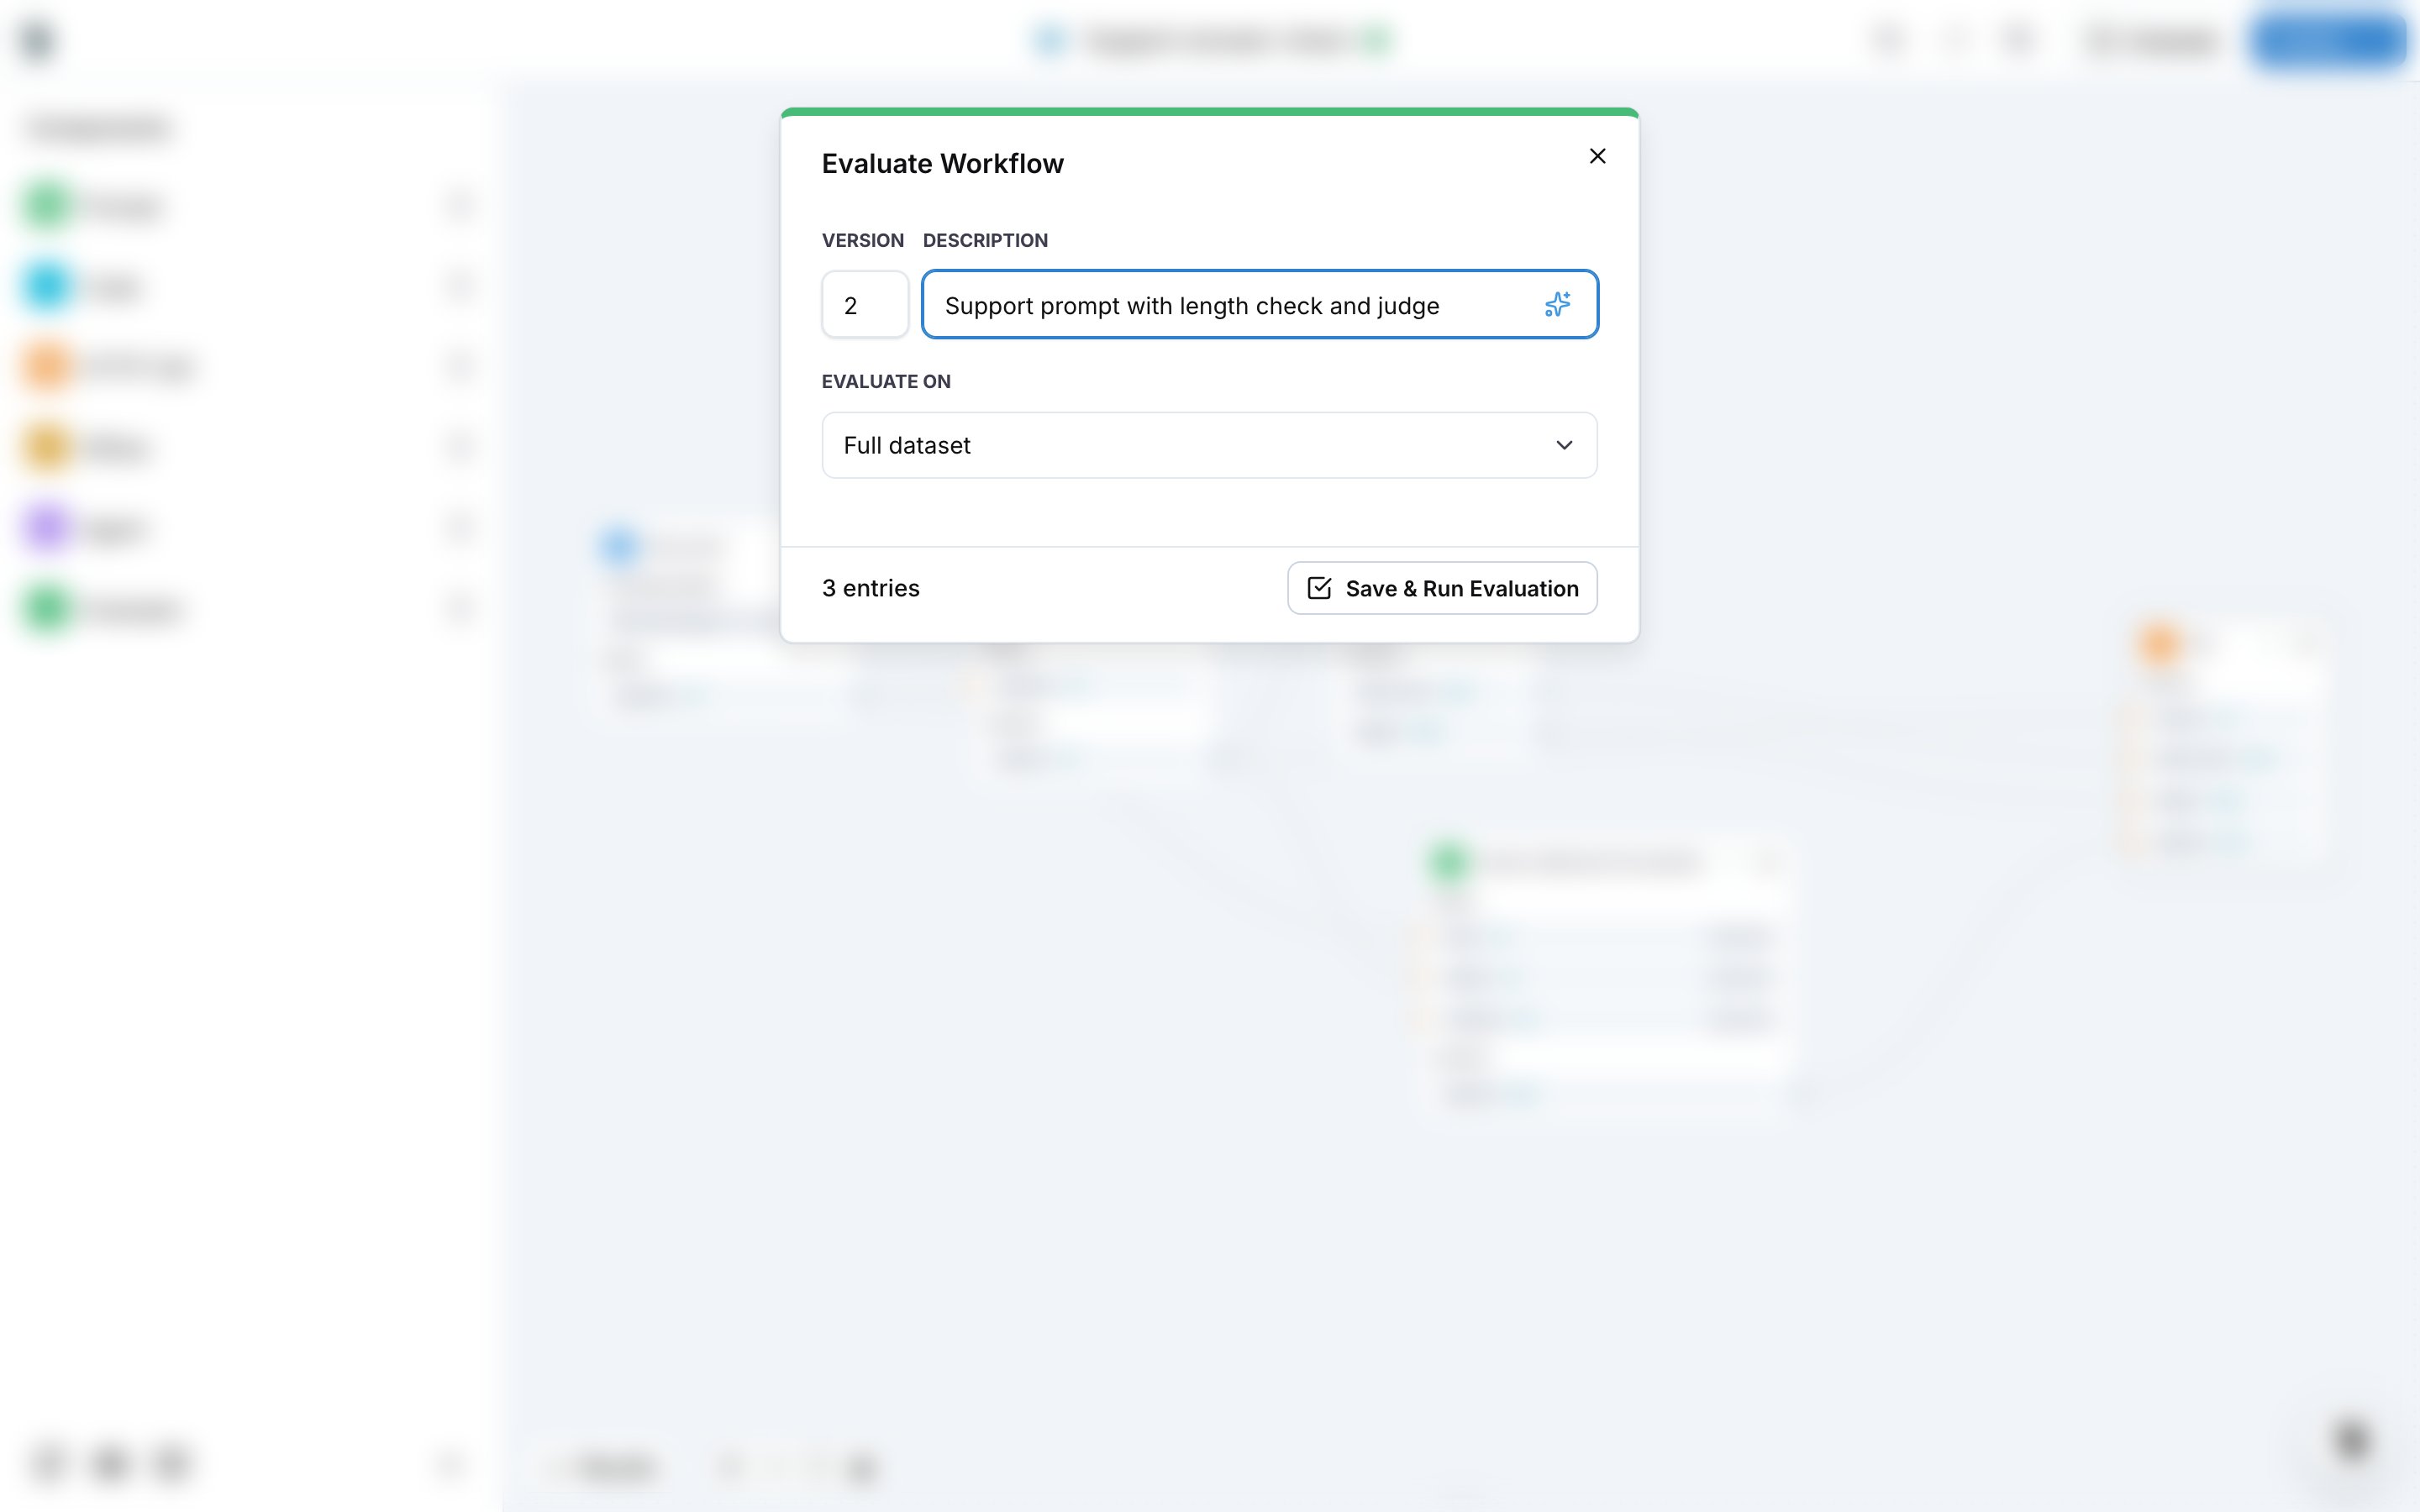
Versions
The editor autosaves every change. The history button in the top bar opens Workflow Versions: type what changed and click Save new version to store a numbered version, or restore an earlier one from Previous Versions. Evaluate and Publish save a version when the workflow changed since the last one.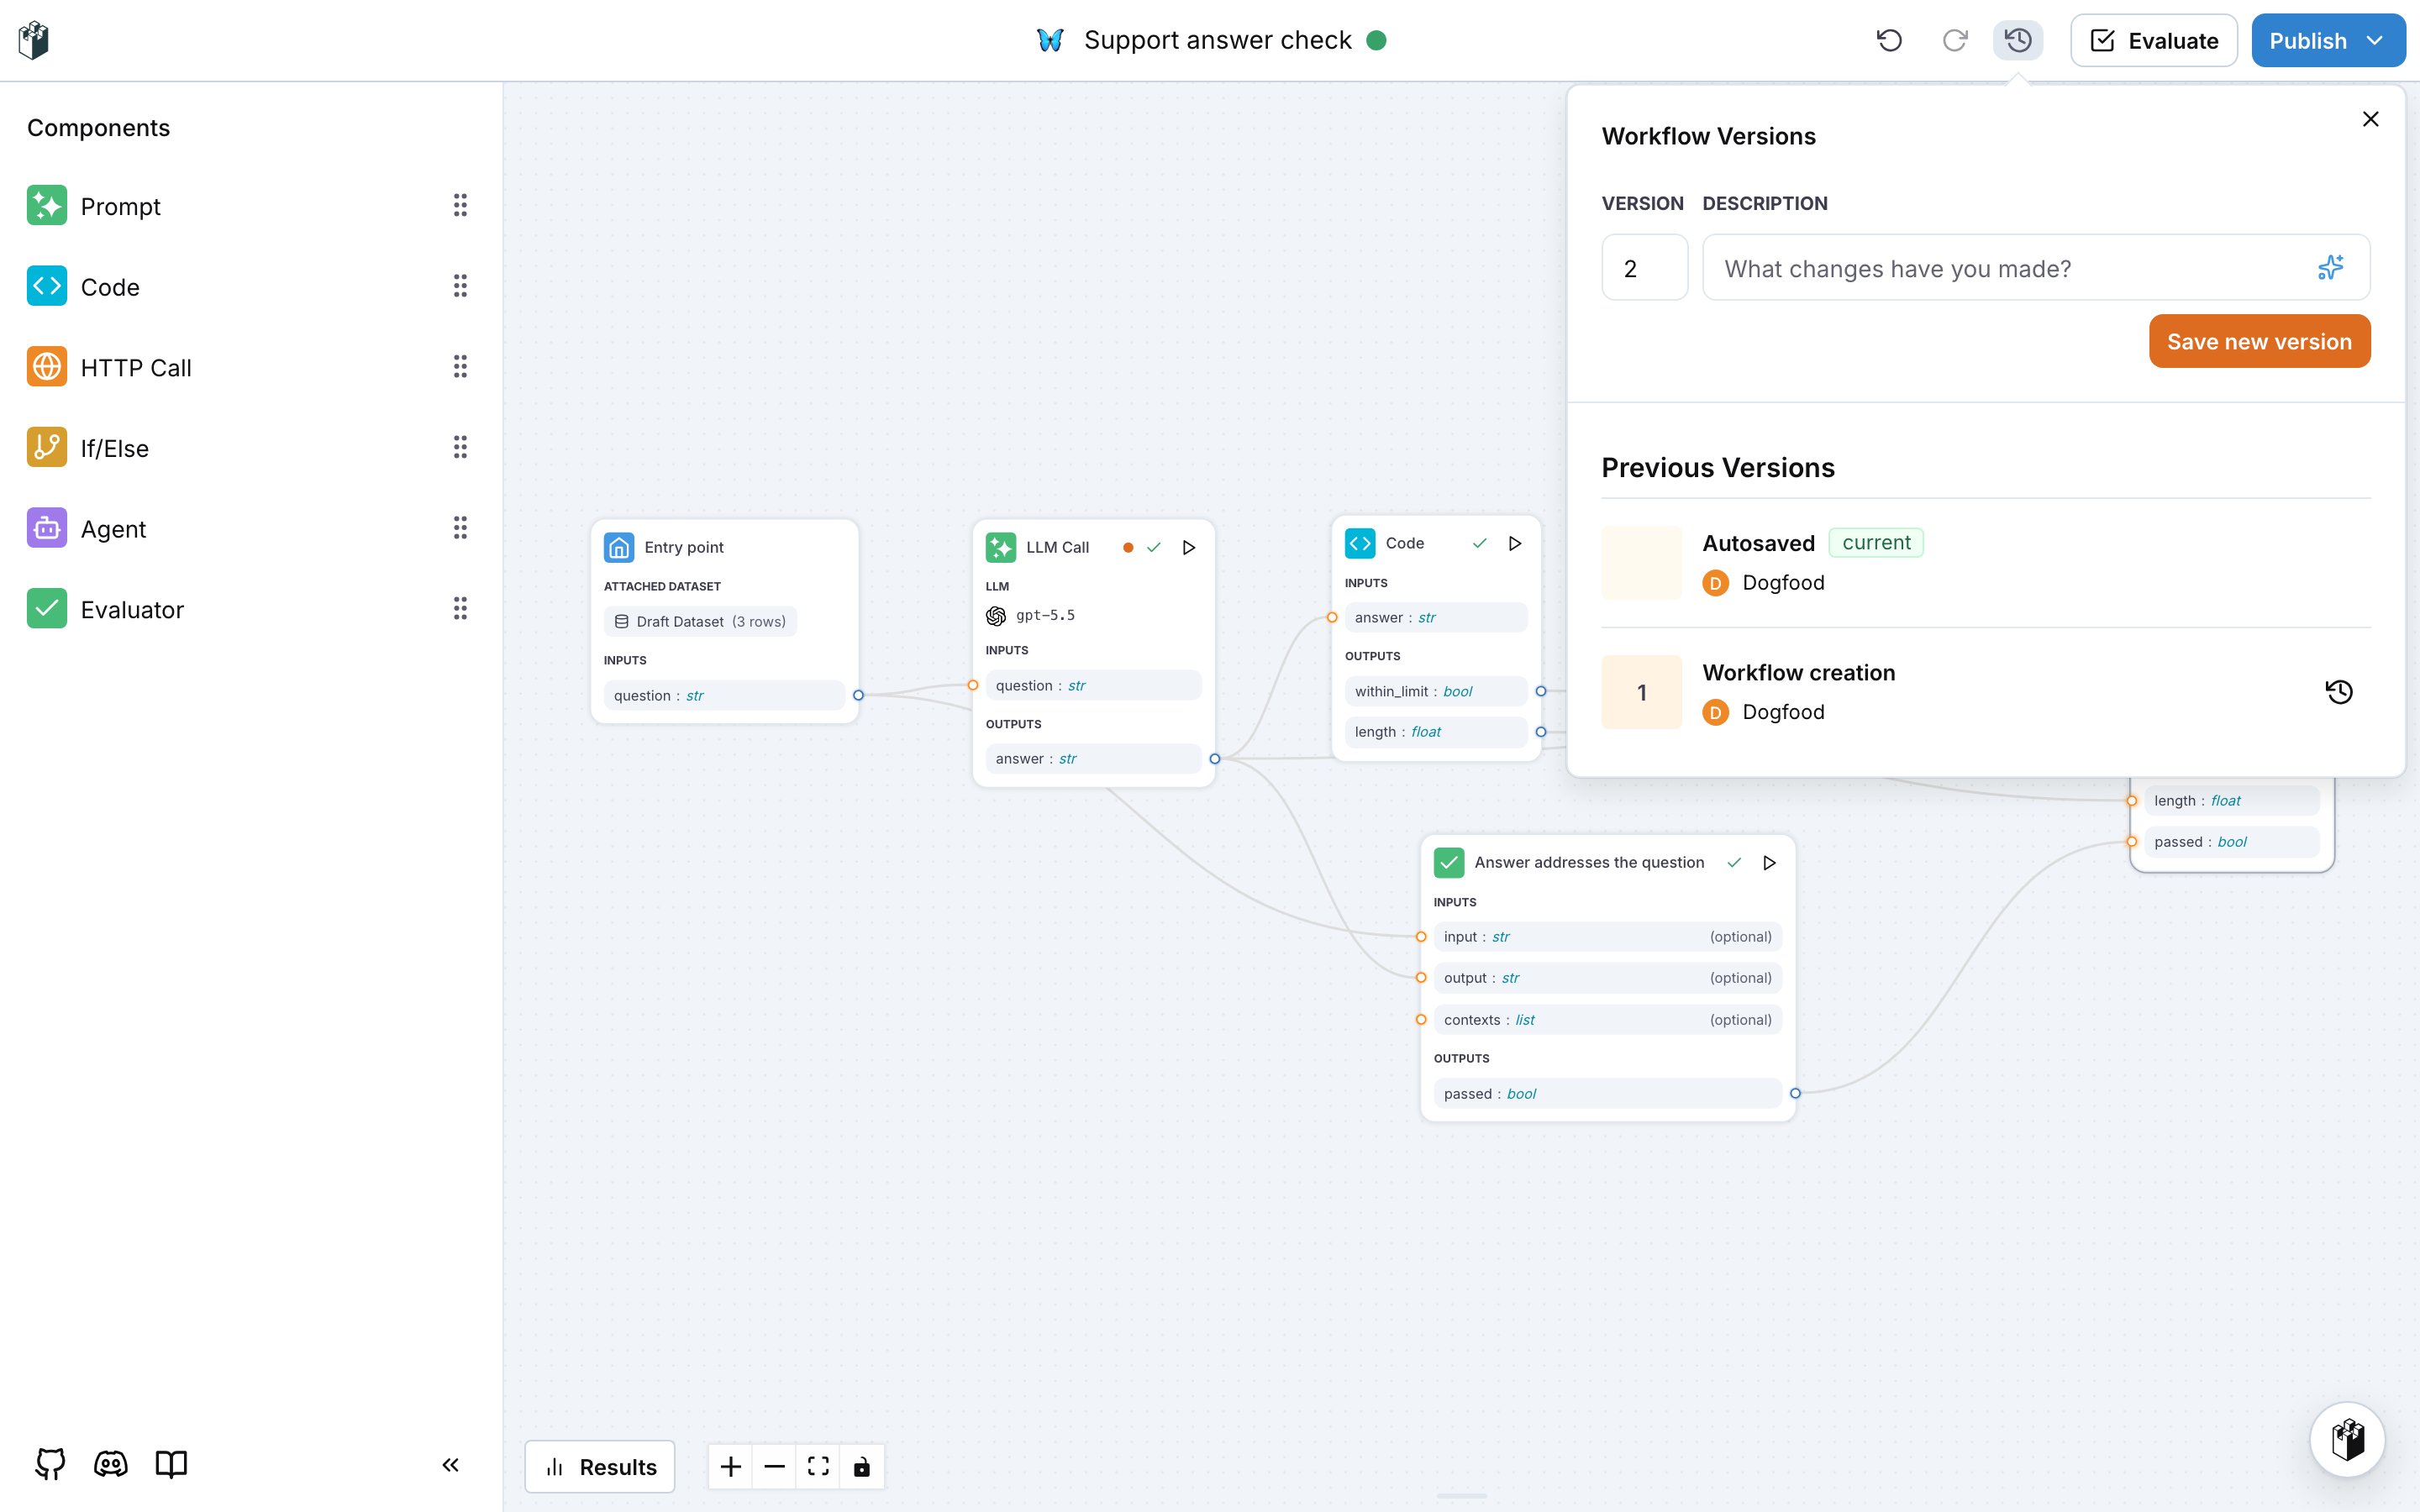
Publish
Publish opens a menu with three actions: