

Ingestion keys and API keys
LangWatch has two kinds of credentials. An ingestion key starts withik-lw- and can only write traces. An API key starts with sk-lw- and can read and change whatever its scope and permissions allow. Both are managed at Settings > API Keys.
An ingestion template mints an ingestion key and writes it into the tool’s
OTEL_EXPORTER_OTLP_HEADERS; the langwatch <tool> CLI does the same. An ingestion key can reference the template so the receiver shapes the trace into the gen_ai.* attributes. The rest of this page covers API keys.
Key types
The Project API Key shown on the project setup page, and in the Legacy row of Settings > API Keys, still works and is not going away. It carries its project, so it does not need
LANGWATCH_PROJECT_ID. Rotate it from that row. Create keys from Settings > API Keys when you need scoped permissions.Create a personal key
1
Open Settings > API Keys
Go to Settings > API Keys and click Create new secret key.
2
Fill in the drawer
- Key type: shown to organization admins only. Pick Personal. Other members always create
a personal key. - Name: for example
Local devorMCP key- Description: optional - Scope: the projects, teams or the organization the key can access - Permissions: All gives the key your own permissions on each scope. Restricted lets you pick read or write per permission category - Expiration: No expiration, 7, 30, 60 or 90 days, or Custom
3
Copy the key
Click Create secret key. The key is shown once, as 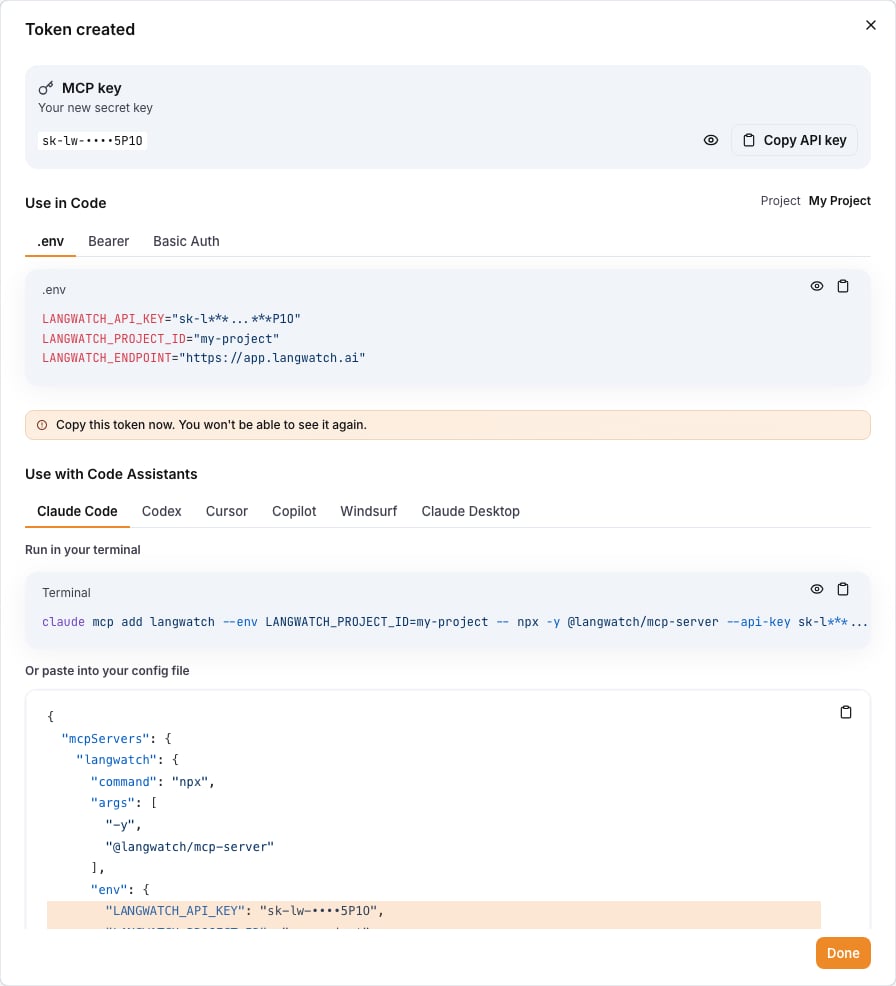
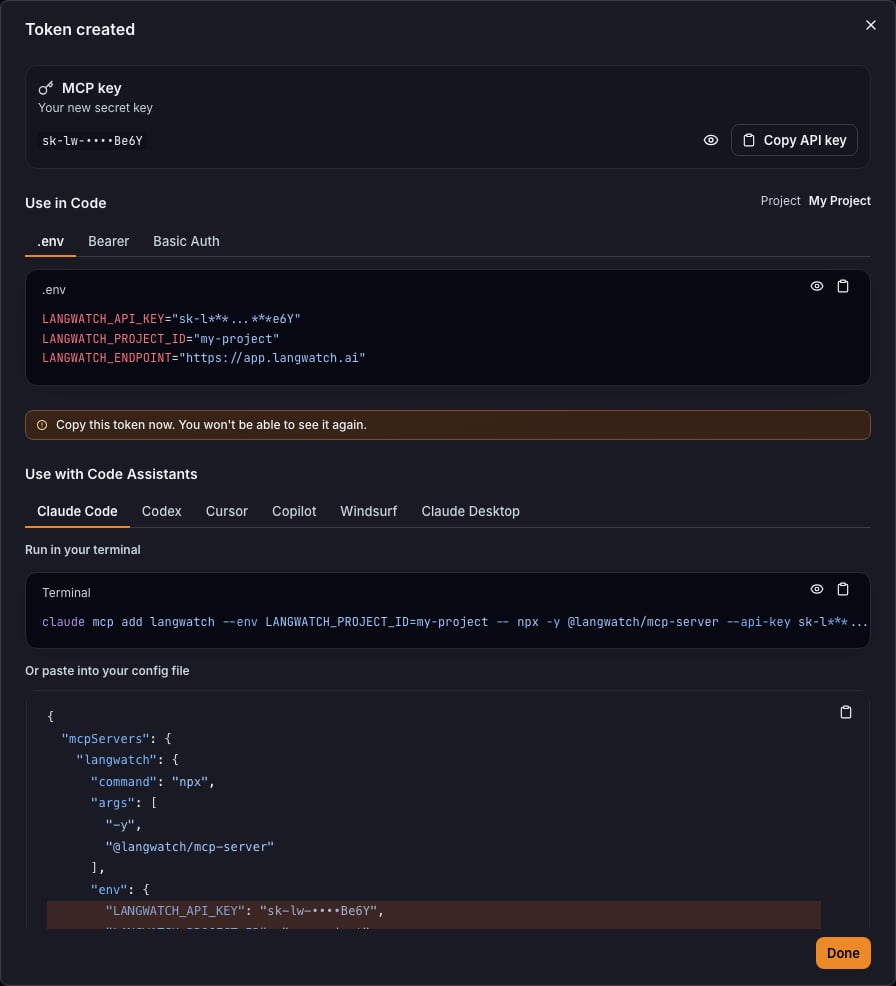
sk-lw-<id>_<secret>, with ready-made .env, HTTP header, terminal and MCP snippets whose copy buttons carry the real key. Copy it now; the table never shows it again.Use a personal key
Set the key and the project id in the environment. The SDKs and the MCP server read both..env
LANGWATCH_PROJECT_ID.
Organization admins can also create a personal key for another member: the drawer shows a member picker, and the key is capped by that member’s permissions.
Create a service key
Service keys are for automated systems: CI/CD pipelines, production services and scripts that span projects. They have no owner, so they keep working when people leave.Only organization admins create service keys.
1
Open Settings > API Keys
Go to Settings > API Keys and click Create new secret key.
2
Fill in the drawer
- Key type: Service
- Name and optional Description
- Scope: the projects, teams or the organization the key can access
- Permissions: All gives Admin on every scope you picked. Restricted gives only the categories you tick
- Expiration
3
Copy the key
Click Create secret key and store the key. It is shown once.
Use a service key
SetLANGWATCH_API_KEY and LANGWATCH_PROJECT_ID as for a personal key. Endpoints that work on the organization, for example the spend events and webhook endpoints of the LangWatch AI Gateway, accept an organization-scoped key without a project id.
- Environment variables
- Python
- TypeScript
.env
Permission categories
A Restricted key holds read or write access per category. Read grants theview action on the resources in the category. Write grants every action on them.
Also check: Access Control (RBAC) for the actions each resource accepts.
Connect an AI assistant over MCP
The LangWatch MCP Server is hosted athttps://app.langwatch.ai/mcp. Most AI clients connect to it with OAuth: you sign in and approve a project, and no key is involved. See the MCP setup guide.
A client that cannot sign in can send a personal key as a header instead. The key gives the MCP server access to traces, analytics, prompts and the other features your key allows:
LANGWATCH_API_KEY and LANGWATCH_PROJECT_ID:
- Claude Code
- Cursor / VS Code
The langwatch login key
langwatch login in the CLI opens a browser page where you approve the scopes, then creates a personal Restricted key named CLI login - <device> and stores it in ~/.langwatch/config.json as cli_api_key. The default selection holds every permission category except managing or deleting the organization and managing teams, at organization scope for organization admins and on your teams otherwise.
One key exists per device: a new login replaces the previous key and langwatch logout revokes it. The key appears in Settings > API Keys as a personal key with the Restricted badge, and you can revoke it there too.
How permissions are resolved
A personal key never exceeds its owner. On every request LangWatch intersects the key’s permissions with what the owner holds at that moment, so a demoted owner’s key loses access at the same time. A service key has no owner. Its permissions come from its scope and permission mode alone.Manage keys
Settings > API Keys lists every key with Name, Status, Secret Key (the prefix only), Created, Last Used, Type (the owner’s email, or Service), Scope and Permissions. A scope filter above the table narrows the list to one project, team or the organization. The key’s owner and organization admins can:- Edit the name, description, permission mode, categories and scope
- Revoke the key. A revoked key is refused at once and cannot be restored